The benefits of avocado start with your heart
Like olive oil, avocado is rich in monounsaturated fat, which has been shown to reduce levels of bad cholesterol in your blood, lowering your risk for heart disease and stroke. In fact, when you replace saturated fats—that’s the bad kind found in butter, cheese, red meat and other animal-products—with monounsaturated fats in your diet, you can lower your levels of artery-clogging LDL cholesterol by up to 10 percent.
What’s more, avocado benefits your waistline by keeping belly fat at bay. One study found that participants who consumed a daily smoothie high in monounsaturated fats saw a reduction in visceral fat, the kind that surrounds your internal organs and is associated with a risk of metabolic syndrome, linked to heart disease, stroke and type 2 diabetes.
Find out how it’s actually possible to reverse heart disease.

Avocado gets an “A” for absorption of vitamins
Avocado—which is classified by botanists as a fruit—pairs well with other fruits and vegetables in salads. Even better, it boosts their essential nutrients. “Because avocado is high in fat, it helps us absorb fat-soluble vitamins like A, D, K and E,” says Caroline Doucet, a registered dietitian in Kelowna, B.C.
Vitamin A in the form of beta-carotene (found in carrots and tomatoes) is essential for healthy vision, and can slow the progression of age-related eyesight decline. It also reduces your risk of bone fractures and supports a healthy immune system.
Vitamin D—which Health Canada recommends as a 400 IU daily supplement to all adults over 50—plays a significant role in regulating your body’s levels of calcium and phosphorus, which are essential for healthy bones and the prevention of osteoporosis.
Vitamin K is another bone-builder that is important for blot clotting, while Vitamin E is an antioxidant, scavenging those nasty free radicals that can damage cells and contribute to atherosclerosis, cancer and vision loss.
Here’s expert advice on how to maintain healthy eyes at every age.
An avocado a day could keep dementia at bay
Half an avocado contains 81 mcg of folate, also known as Vitamin B9, giving you roughly 20 percent of your daily requirement. Folate is important not only for red blood cell formation and chromosomal and DNA repair, but for cognitive health as we age. It blocks the buildup of a substance called homocysteine, which can slow the flow of nutrients to your brain, and there is evidence that a deficiency in folate contributes to depression, cognitive decline, Alzheimer’s and vascular dementia. (Learn how to spot the early signs of dementia.)
Folate, also found in dark green leafy vegetables and legumes, also helps prevent certain cancers.
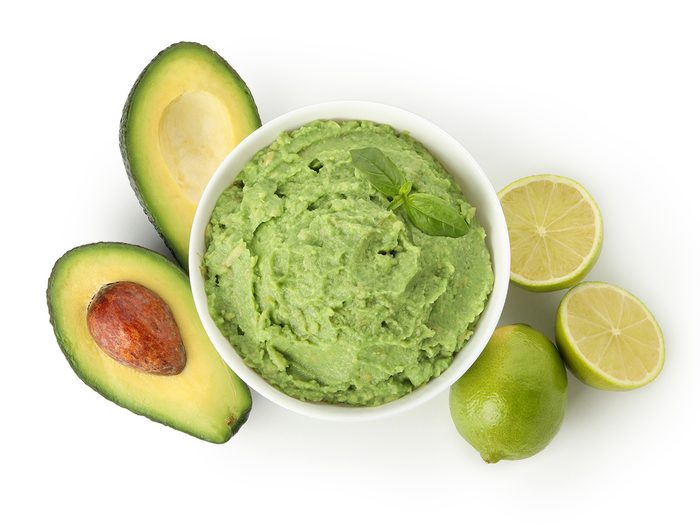
Avocado helps beat the mid-afternoon munchies
Avocado may get a bad rap for being high in calories—a whole one contains 322 of them—but a half is plenty satisfying for most people, says Doucet. What’s more, the benefits of avocado extend to weight loss, if that’s your goal. “Because it has healthy fat and lots of fibre, it increases satiety, which means you feel fuller, longer,” Doucet says. “If you don’t feel satisfied after a meal, that can increase cravings later on.”
A half ‘cado contains nearly 7 grams of fibre—already half your recommended daily intake. One study found that people who regularly consume avocado have a lower average body weight and body mass index (BMI) than those who don’t, despite no significant difference in calorie intake. “That may be because people who eat avocado most likely also eat more fruits and vegetables on the whole,” says Doucet.
It’s packed with potassium
Bananas may get all the glory for being rich in this essential mineral, but avocados are actually better in this respect. One half of an average avocado has 485 mg of potassium, compared to a medium-sized banana at 422 mg—which amounts to nearly 50 percent more potassium per gram of weight. Dice it and serve on top of your lunch salad, and you’ve covered 10 percent of your recommended daily intake.
Despite its importance as both a mineral and an electrolyte required for normal cell function, muscle contraction and nerve transmission, most Canadians aren’t getting enough potassium, according to Hypertension Canada. Low potassium and high sodium in your diet is linked to high blood pressure and heart disease—yet another reason to embrace avocado’s heart-healthy, vitamin and mineral-packed deliciousness.
Now that you know the benefits of avocado, find out the healthiest fish you can eat.
Have you ever wondered why we drive on a different side of the road than our British cousins? It might seem bizarre that U.K. drivers stay on the left, but they’re not the only ones. Around 35 percent of the world population does the same, including people in Ireland, Japan, and some Caribbean islands.
Originally, almost everybody travelled on the left side of the road, according to BBC America. However their mode of transport was quite different from today: Think four legs instead of four wheels. For Medieval swordsmen on horseback, it made sense to keep to the left to have their right arms closer to their opponents. (Presumably the 10 to 15 percent of left-handed knights just had to make it work.) Mounting and dismounting was also easier from the left side of the horse, and safer done by the side of the road than in the centre.
So perhaps the question here should be, why did people stop travelling on the left?
Things changed in the late 1700s when large wagons pulled by several pairs of horses were used to transport farm products in France and the United States. In the absence of a driver’s seat inside the wagon, the driver sat on the rear left horse, with his right arm free to use his whip to keep the horses moving. Since he was sitting on the left, he wanted other wagons to pass on his left, so he kept to the right side of the road.
The British Government refused to give up their left-hand driving ways, and in 1773 introduced the General Highways Act, which encouraged driving on the left. This was later made law thanks to The Highway Act of 1835. Meanwhile post-revolution France, under their left-handed ruler Napoleon, embraced a permanent move to the right side of the road. Amidst all this driving confusion, the British and the French were yielding their power across the globe, and as part of their rapid colonization they insisted that the countries they occupied drove on the same side of the road. This explains why former British colonies such as Australia, New Zealand, and India drive on the left, while former French colonies like Algeria, Ivory Coast, and Senegal drive on the right.
When Henry Ford unveiled his Model T in 1908, the driver’s seat was on the left, meaning that cars would have to drive on the right hand side of the road to allow front and back passengers to exit the car onto the curb. According to National Geographic, this influenced a change in many countries: Canada, Italy, and Spain changed to right-side driving in the 1920s and most of Eastern Europe followed suit in the 1930s. As recently as 1967 (and thanks to around $120-million from their government’s pocket) Swedish drivers began driving on the right. However British drivers remain on the left, and this is highly unlikely to change.
Next, find out the reason cars have gas tanks on different sides.
Nothing beats fresh-off-the-griddle pancakes for breakfast. After slathering your stack in butter, you reach across the table for the maple syrup; but what part of the bottle are you going to grab—the bulky base, or that absurdly small handle? If we’re being honest, the teeny-tiny handle perched on the neck of the bottle isn’t very practical and your finger may even have gotten stuck in it at some point. So why does it exist?
Believe it or not, there’s a reason why maple syrup bottles have those petite handles, but we’ll need to review a bit of Canadian history to find the answer.
The origins of maple syrup
“What was produced since the beginning of time by Indigenous people was maple sugar, because that kept more easily than the syrupy form,” says Jean-François Lozier, a curator at the Canadian Museum of History who specializes in French North American history. There was no easy way to store syrup as a liquid, but hardened, dry maple sugar could be packed with ease in traditional birch bark baskets.
It wasn’t until the late 19th-century that the consumption and production of maple syrup started overtaking maple sugar. When early Canadian colonists took up the Indigenous practice, maple syrup became more commonly stored in tin cans, which were more efficient for packaging and transportation.
Why is maple syrup packaged in glass bottles today?
You can’t simply pour maple syrup into any container and call it a day. There are three things to consider: temperature, time and air. To preserve the quality of the syrup, it’s best to store it in the refrigerator and in a completely airtight container. The familiar glass bottles that you’ll find on grocery store shelves today pull double duty by maintaining the flavour of the syrup for a longer period of time because they prevent oxidization—and they also showcase its rich amber hue.
So what’s with the tiny handles?
During the late 1800s, salt-glazed stoneware was the equivalent to Tupperware. Although not typically used to store maple syrup, the heavy round ceramic jugs were used to hold everything else, from molasses to liquor, and had large handles which made them easier to carry. It wasn’t long until they were on their way out and replaced by a cheaper alternative: glass.
“Maple syrup companies weren’t so much retaining an old pattern of a jug as reinventing it and wanting to market their product as something nostalgic,” says Lozier. “They were tying in the image of maple syrup with their product and the image that people still had of those crocks in the 19th-century.” Essentially, the tiny handles that we’ve come to associate with the maple syrup bottle design were added purely as a decorative element, and as a tribute to the large ceramic jugs that once graced every Canadian home.
So, the next time you have a craving for maple syrup, take a moment to appreciate this subtle design nod to the past.
Next, find out what you can tell about maple syrup from its colour.
Everybody loves their laundry to be sparkling white and using bleach is a common way to achieve this. But bleach isn’t the only (or even the best) option. In fact, bleach can be harmful to your health and the environment. If bleach is mixed with other substances (such as vinegar), it produces toxic fumes. Passive exposure to bleach is also a problem: A 2015 study by European researchers found that having bleach in the home resulted in a higher rate of childhood illnesses like tonsillitis, flu and breathing conditions. (Did you know that bleach also has an expiry date?)
But, it is possible to whiten without bleach and the miracle cleaning ingredient is… lemon juice!
How does lemon juice whiten laundry?
Lemon juice contains high levels of citric acid. The enzymes in the acid react with stains on your laundry to loosen and remove them naturally, leaving fabrics beautifully white. The application of lemon juice is best reserved for white laundry as it could cause coloured items to fade more quickly.
How to whiten clothes when hand-washing
Combine two cups of lemon juice with one cup of salt. Soak the clothes in the solution, rinse them out well, and leave them to dry in the sun. The sunlight also acts as a natural whitener.
How to whiten clothes in a washing machine
Using lemon juice to whiten without bleach is even simpler in a washing machine. Just add a cup of lemon juice along with your detergent and wash as usual. Again, drying the clothes in the sunshine will enhance the whitening effect.
So by using lemon juice instead of bleach in your laundry, you can relax in the knowledge that your clothes will be beautifully white without damaging your health or the environment.
Next, follow our healthy home checklist to eliminate potential hazards in every room.
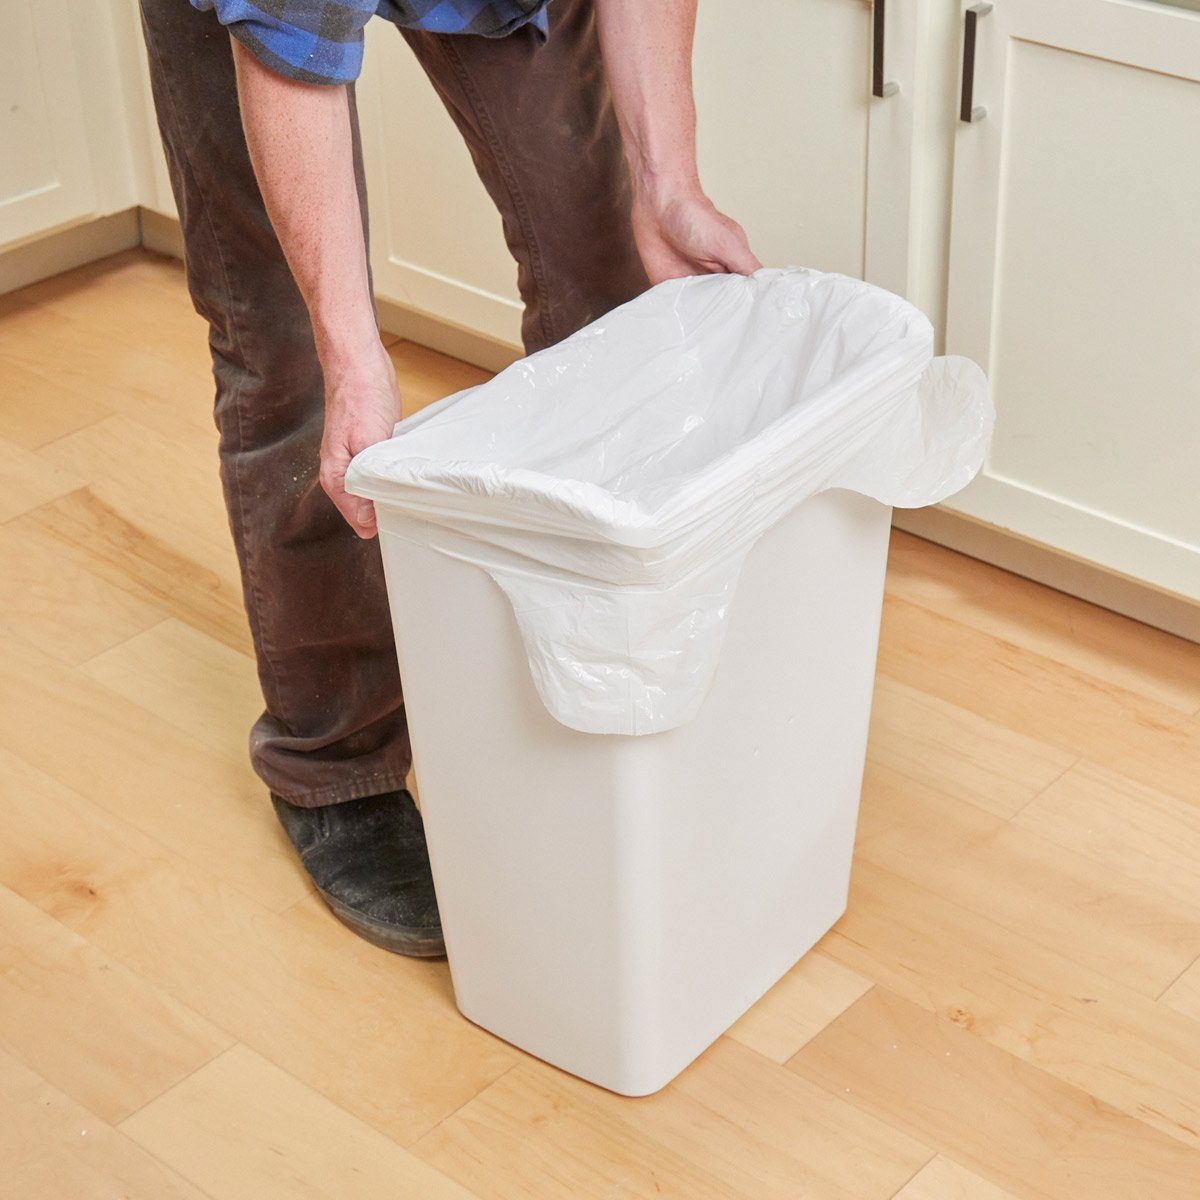
We’ve all been there. You’re trying to quickly get the trash out and the full, heavy bag of garbage vacuum-seals itself into the bin. Shifting the bag back and forth until it finally slips free can be time-consuming and quite the workout, but pulling the bag too hard will just rip it open spilling your garbage all over the place. Luckily, this simple trick will stop the problem in its tracks!
“When a trash bag fits tightly around the rim of the trashcan, it forms a seal. This leaves a new bag bubbled up and hard to fill, and makes a full bag hard to remove. A few ¼-inch holes drilled into my plastic trashcans solves both problems.” – Jim Manning
Drilling holes into the side of the bin allows air to enter the garbage can beneath the seal of the bag, making it impossible for the bag to vacuum-pack itself in. You’ll be able to easily slide the full bag out of the bin and remove it from your home. Problem solved! Our friends at The editors at Family Handyman found that a couple of ¼-inch holes do the trick. A power drill is the easiest way to achieve this, but depending on the material of your garbage can, you may have to get creative. A metal trash can will require specialized tools, and maybe a professional’s assistance.
Next, discover 13 cleaning hacks that take the hassle out of housekeeping.
The “gut” may seem like a simple term, but it actually involves numerous parts of the body connected to the digestive and gastrointestinal tracts, as well as the microbiome. The gut microbiome is made up of trillions of bacteria and microorganisms inside the large intestine, and having a diverse set of bacteria is key for keeping different bodily functions working properly such as the nervous system, immune system, digestive function and even our mental health. What we eat plays a major role in the health of the gut microbiome, and certain foods can harm your gut health. According to Chris Damman, MD, MA, a board-certified gastroenterologist at the University of Washington in Seattle and the chief medical and scientific officer at Supergut, if you’re not feeding your gut properly, you could be facing some major health concerns down the line.
“The foods you eat determine the type of bacteria that grow in your gut,” says Dr. Damman. “Healthy foods that grow healthy bacteria will make factors that grow healthy gut cells. This means less ‘leaky gut,’ less inflammation, and a healthier body overall.”
Nevertheless, while indulgence is fine once in a blue moon, there are certain types of foods that can harm your gut when consumed on a regular basis by creating an unhealthy environment for your gut’s bacteria. Dr. Damman shares three foods to be wary of if you’re looking to keep your gut health in check.
For more wellness updates, sign up for the (free!) Reader’s Digest Health Report.
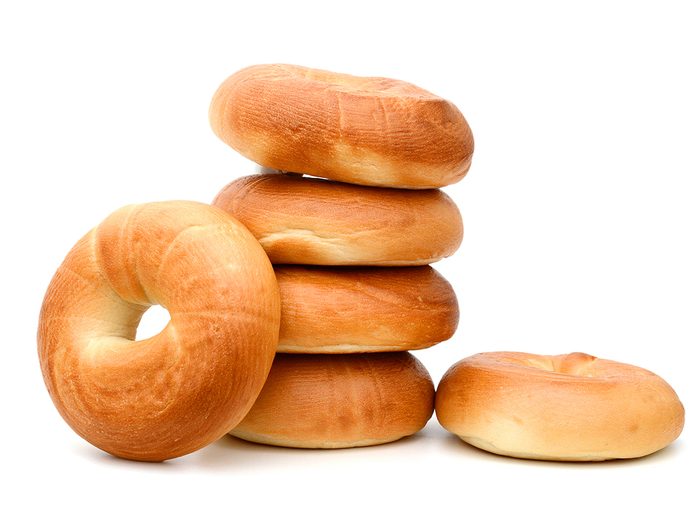
The Worst Foods For Your Gut
Refined baked goods
While packaged and refined baked goods—like store-bought pastries, white bread and bagels—can make for a treat in the morning, many gut health specialists, like Dr. Damman, consider these to be foods that can harm your gut.
“Especially those containing high fructose corn syrup should be avoided,” Dr. Damman says. “These foods are missing fibres that are transformed by gut bacteria into molecules that grow healthy colon cells and protect your body from obesity and diabetes. Better options (in moderation) are baked goods that contain whole grains, and that are missing high fructose corn syrup in their ingredient list.”
Having a sufficient amount of dietary fibre in the diet is important for keeping the bacteria in the gut fed. When the bacteria in the gut aren’t fed, a 2021 peer-reviewed study in Nutrients suggested there can be an increased risk for gut-related diseases, including inflammatory bowel disease, obesity, type 2 diabetes, and metabolic syndrome.
Here are 12 high-fibre foods worth adding to your cart.

Processed meats
Dr. Damman says, “Bacon, hot dogs, beef jerky and lunch meats are associated with a higher risk of colon cancer because the natural components and additives get transformed into carcinogens during the cooking process.” He adds: “A better option (in moderation) is meat from the butcher, especially white meat or low amounts of grass-fed meat that contain higher amounts of good fats.”
According to a 2021 University of Washington School of Medicine study, an increased presence of certain types of unhealthy bacteria has been linked to an increased risk of colon cancer, indicating a greater likelihood that colon polyps will become cancerous.
A 2021 review in BMC Cancer affirmed these findings and stated that the gut microbiome has important clinical implications for colorectal cancer prevention, while modulating the gut microbiota is important not only for cancer risk, but also for the individual’s overall health.
Here’s expert advice on how to heal your gut.

Sugary drinks
Sugary drinks go beyond just sodas—even juices and some diet sodas can harm your gut, especially if they contain high fructose corn syrup, saccharin, or sucralose.
“These drinks can grow unhealthy bacteria in your colon and cause diarrhea, as well as diabetes and obesity,” says Dr. Damman. According to a recent 2022 review in Clinical Gastroenterology and Hepatology, both hyperglycemia (high blood glucose levels) and excessive sugar intake can disrupt the intestinal barrier, which increases gut permeability and can cause gut microbiota dysbiosis—an imbalance of bacteria in the gut, which can have negative implications. (Discover 25 more ways sugar is making you sick.)
“Better options are satisfying cold water as well as unsweetened teas and coffee. If you do use a sugar substitute, allulose is one that might be more associated with [better] health.”
Next, check out a 10-step plan to boost your gut health.
How annoying is the advice to get more sleep? It’s not like you don’t want a more restful night, but work deadlines and the laundry pile and a nighttime head full of busy thoughts are just a few of the reasons plenty of us miss out on sleep.
However, new insights from Penn State University published August 2023 in Psychosomatic Medicine show the impact of those sleepless hours: Your heart health deteriorates with continuous sleep deprivation, and a weekend sleep-in isn’t a guaranteed strategy to recover.
If you need permission to set a grown-up bedtime just like you set your morning alarm, keep reading.
For more wellness updates, sign up for the (free!) Reader’s Digest Health Report.
The sleep study
Researchers embarked on an 11-day inpatient sleep study involving 15 healthy men aged between 20 and 35 years. At the study’s start, participants enjoyed three nights of ample sleep, with a generous 10-hour window for slumber. This phase was followed by five nights of a mere five-hour sleep window. The study concluded with two “recovery nights,” when participants could again benefit from up to 10 hours of sleep. Throughout these phases, resting heart rates and blood pressure were monitored every two hours during participants’ wakefulness.
Anne-Marie Chang, PhD, associate professor of biobehavioural health at Penn State and co-author of the study, notes one outcome in a press release: “Only 65% of adults in the U.S. regularly sleep the recommended seven hours per night.” With evidence already indicating an association between inadequate sleep and long-term cardiovascular disease, Dr. Chang emphasizes the study’s findings as “a potential mechanism for this longitudinal relationship.”
Important findings
Throughout the study, the researchers noted a consistent increase in heart rate: It rose by almost one beat per minute (BPM) each day. Starting from an average baseline of 69 BPM, the heart rate reached about 78 BPM by the second day of recovery. Similarly, systolic blood pressure (the top number in a BP reading) showed an increase, growing by approximately 0.5 millimetres of mercury (mmHg) daily. It began at an average of 116 mmHg and climbed to around 119.5 mmHg by the end of the recovery period. That’s no small jump.
David Reichenberger, MS, the study’s lead author and a graduate student in biobehavioural health at Penn State, stressed the study’s implications, saying, “Both heart rate and systolic blood pressure increased with each successive day and did not return to baseline levels by the end of the recovery period.” Simply put, even after two nights of extended sleep, the participants’ cardiovascular health remained compromised.
Why it matters
It’s more than just heart health at stake. “Sleep affects our weight, our mental health, our ability to focus, and our ability to maintain healthy relationships with others,” Dr. Chang pointed out.
These findings suggest that our hearts really do feel the strain of those late nights. More surprisingly, a couple of nights of “recovery” sleep don’t seem to help your heart bounce back to its baseline. Your heart rate and blood pressure might not reset, indicating that the toll taken by consecutive nights of moderate sleep restriction could require a more extended recovery period than previously thought.
The next time you’re tempted to stay up late, remember: Those lost hours have a lasting impact, and the recovery might not be as simple as sleeping in on Saturday. Sleep, as Dr. Chang said, is not just a luxury; it’s both a biological and behavioural process—one that deserves your undivided attention for the sake of your heart and overall health.
Find out how to improve your heart health in six steps.
Quick tips for better sleep
The CDC offers several tips to enhance your sleep quality if you’re facing sleep challenges:
- Adhere to a consistent bedtime and wake-up schedule, including on weekends. (Here’s expert advice on how to fix your sleep schedule.)
- Optimize your bedroom environment: Ensure it’s quiet, dark, and free from electronic distractions. (Follow this sleep hygiene checklist before you turn in for the night.)
- Refrain from consuming large meals, caffeine, or alcohol shortly before bed. (Some experts suggest a three-hour break between the final food you consume for the day and bedtime.)
- Additionally, don’t underestimate the power of physical activity during the day. Regular exercise can make it easier for you to drift off at night.
Remember, if sleep difficulties persist, always consult your healthcare provider for guidance.
Next, check out 10 podcasts to help you sleep better tonight.
“Preheat oven to 350° F.” This is the first line of the majority of baking recipes in print. Be it for cookies, cakes or casseroles, the oven temperature rarely changes. Have you ever wondered why?
The Maillard Reaction
Chances are, if you have a passion for cooking, you’re familiar with the Maillard reaction—whether you know it by name or not! This is the chemical process that causes the proteins and sugars in your food to turn brown. Think of it as the difference between plain and toasted bread. Apart from colour, this reaction creates hundreds of flavour compounds, making many foods much tastier.
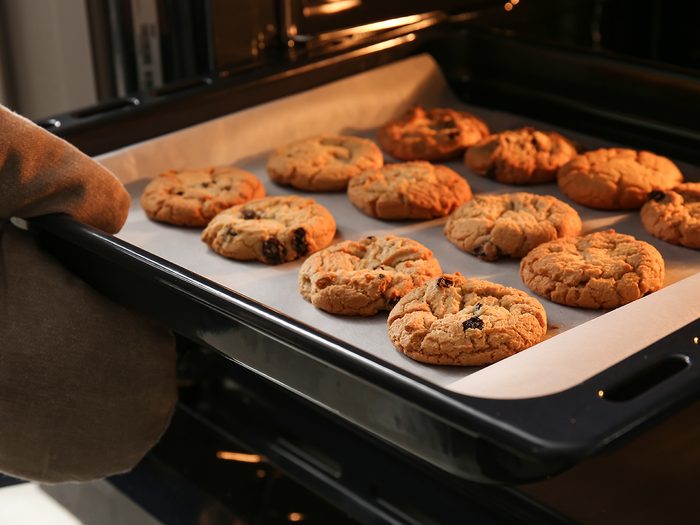
Temperature’s Role in Baking
The Maillard reaction is known to happen at some point between 300° and 350°. Because ovens often fluctuate (or are incorrectly calibrated) a setting of 350° essentially ensures that the browning temperature is reached. Read: It’s a clever way to make sure that all of those glorious flavours are formed.
Anything Else?
Not everything bakes at 350°. Cornbread, pies and muffins often require higher temperatures, while granola and meringues don’t need such high heat.
While it isn’t a foolproof number, 350° is a moderate temperature that will cook your food without burning it (if baked for a reasonable amount of time!). Since it’s high enough for browning reactions to occur, your food will taste more complex and undoubtedly more delicious.
Grace Mannon is currently a stay-at-home mom with an M.S. in food science. She loves baking and cooking and writes about her endeavours on her blog, A Southern Grace.
Next, find out what you can tell about maple syrup from its colour.
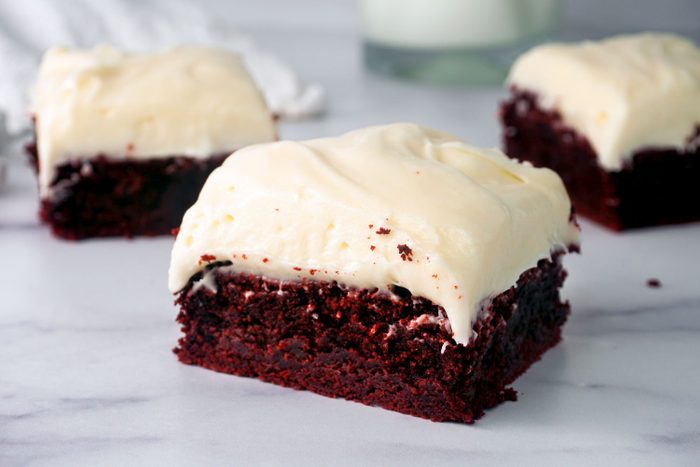
We love experimenting with different brownie flavours. While we’d never turn down a batch of classic chocolate brownies, it’s exciting to breathe new life into an old favourite by introducing different ingredients. Our recipe for red velvet brownies is yet another way to take an everyday brownie recipe to the next level.
This recipe transforms red velvet cake into the perfect red velvet brownie recipe!
What are red velvet brownies made with?
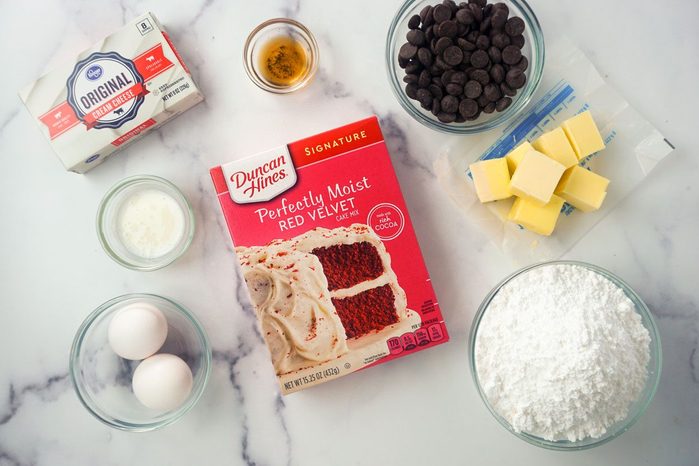
You’ll need a box of red velvet cake mix and five other basic ingredients. Top with our cream cheese frosting recipe (or store-bought frosting), and you have all of the classic tang and subtle cocoa flavour red velvet is known for.
Red velvet brownies recipe
This recipe makes (1) 9×9-inch pan of brownies, approximately 9-12 servings.
Ingredients
- 1 box (432g) red velvet cake mix
- 10 tablespoons (140g) unsalted butter, melted
- 2 large eggs, room temperature
- 2 tablespoons (30g) buttermilk, room temperature
- 1 tablespoon pure vanilla extract
- 5 ounces (135g) dark chocolate chips, melted
Frosting:
- 8 ounces (226g) cream cheese, softened to room temperature
- 1/3 cup (85g) unsalted butter, room temperature
- 2-1/2 cups (300g) confectioners’ sugar
- 1 tablespoon pure vanilla extract
- 1/8 teaspoons salt
Directions
Step 1: Whisk together the wet ingredients
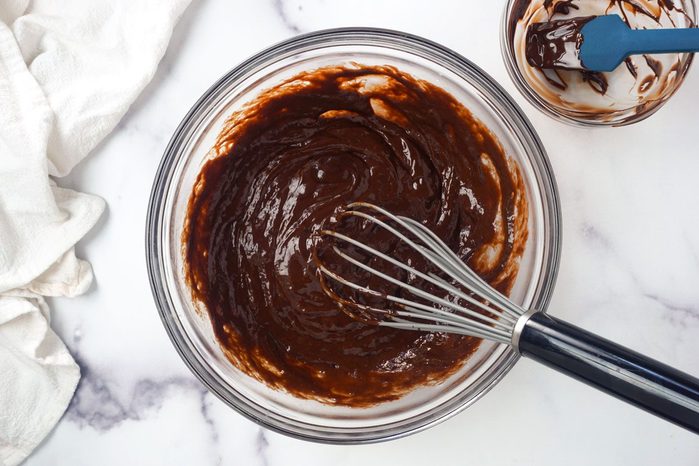
In a large mixing bowl, combine the vanilla, buttermilk (you can make homemade buttermilk, if needed), melted butter and eggs. Beat with a whisk until well combined, then stir in the melted chocolate until evenly mixed.
Step 2: Stir in the dry ingredients
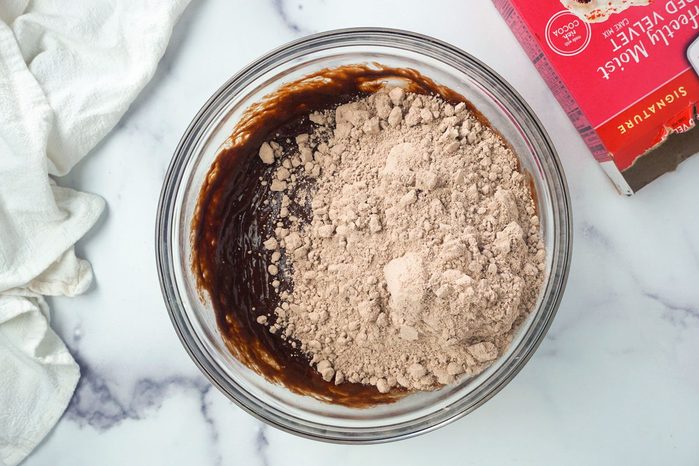
Next, add the cake mix and fold it into the wet ingredients until just incorporated. The batter will be thick and heavy.
Editor’s Tip: Take care not to overmix, as you don’t want to overwork the flour and develop the gluten too much. Nobody likes a tough and stodgy brownie.
Step 3: Rest the batter
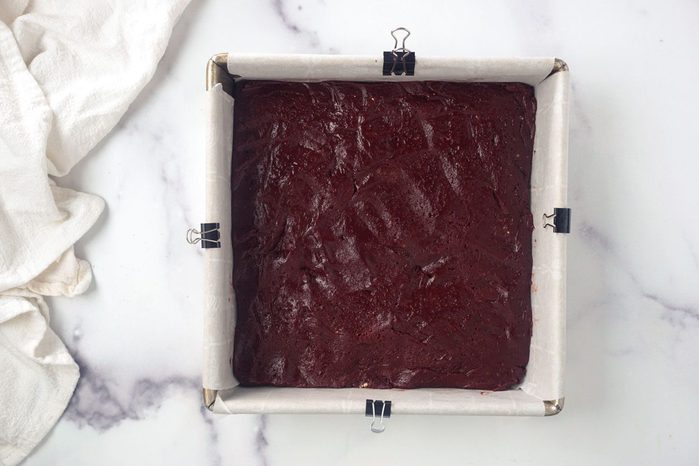
Spread the batter evenly into a parchment-lined 9×9-inch baking pan. Then cover and refrigerate for at least 1 hour.
For extra fudgy brownies with supreme red velvet flavour, let the batter rest, covered, in the fridge for up to 72 hours. Resting the batter improves the flavour and allows the flour to fully hydrate to yield a super decadent brownie.
Step 4: Prepare the frosting
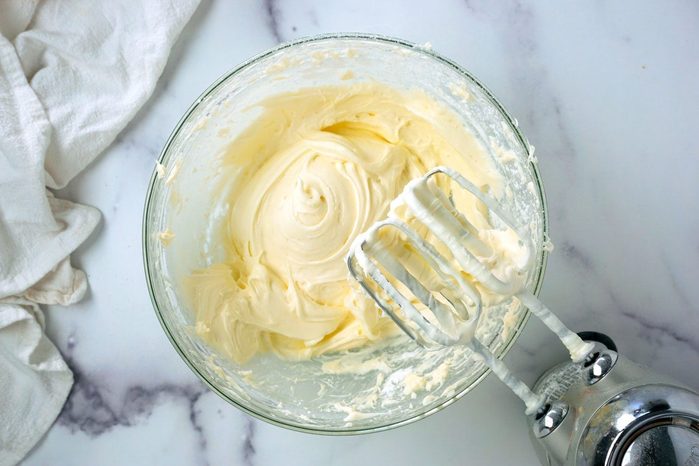
While the brownie batter rests, prepare the cream cheese frosting. Using an electric mixer, beat the cream cheese and butter until light and fluffy. Then, slowly mix in the confectioners’ sugar until thoroughly combined. Finish with the salt and vanilla. Keep refrigerated until ready to use.
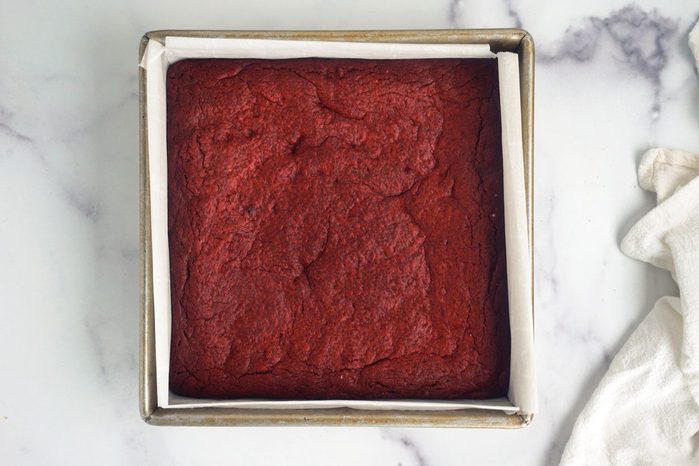
Step 5: Bake
Preheat oven to 350°F. Then bake the brownies for 20-25 minutes until the edges appear set. Remove and let cool.
Editor’s Tip: If you are Team Fudgy Brownies, try a trick from the 100-hour brownies. Immediately after removing the brownies from the oven, cover the pan tightly with foil. Transfer to the freezer and cool for 30 minutes. This trick locks in the steam and allows the moisture to condense and soak back into the brownies as they cool. The result? Ultra-dense and fudgy brownies of your dreams.
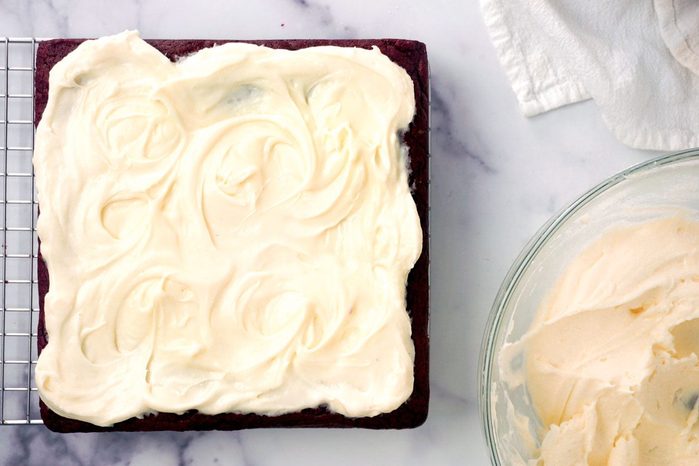
Step 6: Frost and serve
To serve, carefully remove the brownies from the pan and spread an even layer of the cream cheese frosting over top. Cut into squares. Enjoy!
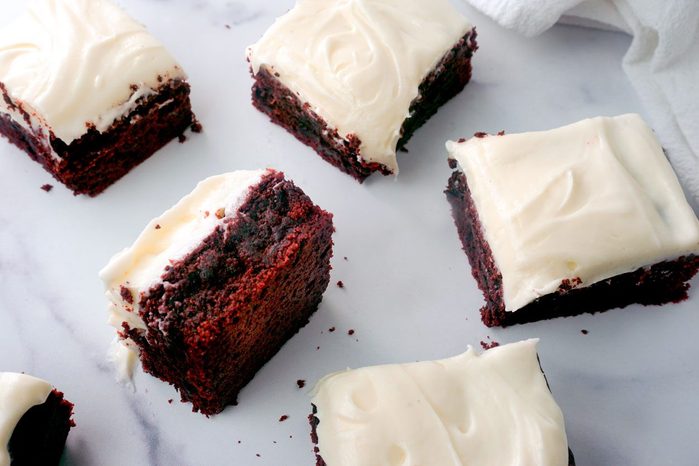
Tips for making red velvet brownies
New to making brownies? Here are some of our best tips for making red velvet brownies with cake mix.
Should the brownies turn out fudgy or cakey?
This recipe results in super dense and fudgy red velvet brownies. If you prefer cake-like brownies with a lighter, loftier texture, skip resting the batter. You could also experiment with adding one additional egg to the batter.
What kind of icing should I put on red velvet brownies?
We prefer a classic cream cheese frosting. However, that’s far from the only option! Try the white chocolate frosting from this coconut cake recipe, the cream cheese filling from these red velvet whoopie pies or a dusting of powdered sugar.
How do I store red velvet brownies?
Unfrosted red velvet brownies may be stored, covered, at room temperature for 4 days. Red velvet brownies with cream cheese frosting should be kept refrigerated due to the dairy in the frosting. Store covered in the refrigerator for up to 4 days.
Next, check out 12 fall cookies that’ll make your home smell amazing.

What are apple cider cheesecake cookies?
These cookies combine our go-to fall beverage—apple cider—with two of our favourite desserts: cheesecake and cookies. According to recipe developer Ginny Dyer, the cookies taste exactly like apple cider doughnuts with a cheesecake filling. Yum!
How to make apple cider cheesecake cookies
This viral recipe was shared by @inbloombakery on TikTok. The original post for “super chewy apple cider spiced cookies stuffed with creamy cheesecake” has 775,000 likes and counting. In other words, the internet can’t get enough!
@inbloombakery APPLE CIDER CHEESECAKE COOKIES🍎✨ Super chewy apple cider spiced cookies stuffed with creamy cheesecake filling, brushed with butter & sprinkled with spiced sugar. The key to lots of apple cider flavor without adding too much moisture to the cookies is reducing the apple cider A LOT. Like you’re going to almost make a hard candy with it, you can see how hard and sticky it gets, but this will allow the cookies to stay super chewy while adding a strong apple flavor! And we’re stuffing them with cream cheese for good measure, but if you’d rather, you can leave the cheesecake part out ❤️ #applecidercookie #applecider #cheesecakecookies #applecookies #fallbaking #fallcookies ♬ Moonlight Serenade – Glenn Miller
Ingredients
Cheesecake filling:
- 6 ounces cream cheese, cold
- 3 tablespoons granulated sugar
Cookies:
- 2 cups apple cider
- 1-3/4 cups all-purpose flour
- 2-1/2 teaspoon cinnamon
- 1/2 teaspoon nutmeg
- 1/4 teaspoon allspice
- 1/2 teaspoon baking powder
- 1/2 teaspoon baking soda
- 1/2 teaspoon salt
- 3/4 cup unsalted butter, softened
- 3/4 light brown sugar
- 1/4 cup granulated sugar
- 2 egg yolks, room temperature
- 2 teaspoon vanilla extract
Spiced sugar:
- 1/4 cup granulated sugar
- 1/4 teaspoon cinnamon
- 1/8 teaspoon nutmeg
- Pinch of allspice
- 1-2 tablespoon salted butter, melted
Directions
Step 1: Simmer the apple cider
Start off by creating an apple cider reduction, which Ginny says is the most important step. In medium saucepan over low to medium heat, simmer 2 cups of apple cider for 25 to 38 minutes. It’s an odd range, but the exact time depends on the heat. You’ll know the reduction is almost done once the consistency noticeably becomes more bubbly. Stir consistently to make sure it’s not overdone. The final result will be 2 tablespoons of a viscous, honey-like texture.
Step 2: Prep the cheesecake filling
Throw cream cheese, granulated sugar and vanilla in a small bowl and cream with a hand mixer on medium to high speed for 2 minutes. The cheesecake filling should have a pillowy consistency and the sugar should be fully dissolved.
In increments of 2 teaspoons, line up 16 cheesecake filling scoops onto a baking sheet lined with parchment paper. Then, pop those cheesecake dollops into your freezer. Ginny advises to wait until they’re frozen and firm so the filling won’t leak out from the cookies as they’re baking.
Step 3: Preheat the oven and prepare baking sheets
Preheat your oven to 350°F. Then, prep two baking sheets by lining them with parchment paper.
Step 4: Create a flour mixture
Add flour, cinnamon, nutmeg, allspice, baking soda, baking powder and salt to a medium bowl and whisk it all together—the right way! Put the mixture aside.
Step 5: Cream butter and sugar
In a large bowl, cream the butter, brown sugar and granulated sugar until the result is light and fluffy.
Step 6: Add in the rest of the cookie ingredients
Add the egg yolks, vanilla and apple cider reduction to the rest of the wet ingredients. Mix on medium speed for 3 to 5 minutes.
Ginny’s Tip: The apple cider reduction will be extra sticky after it’s cool, so get ready to scrape it from a spoon!
Step 7: Combine wet and dry ingredients
Add the dry ingredients. Fully mix the ingredients all together on low speed. Use plastic wrap to cover the bowl and place it in the fridge for 15 to 20 minutes. Ginny says this makes the dough easier to work with.
Step 8: Place the cookie dough on baking sheets
After the cookie dough has chilled, scoop 16 1-1/2 tablespoon portions of dough. Use three fingers to slightly flatten each dough portion. Grab a dollop of the cheesecake filling and place in the centre of the flattened dough. Then, wrap the dough around the cheesecake filling until it’s fully concealed by the dough. Repeat for the rest of the cookies.
Take the prepared cookie dough balls and place them evenly on a baking sheet. Then, pop 6 cookies in the oven at a time. They take 11 to 12 minutes to bake, and Ginny recommends 11-1/2 minutes as the ideal baking sweet spot. Let each batch cool for 15 minutes before transferring onto a wire rack to fully cool.
Step 9: Create the spiced sugar
Add sugar, cinnamon, nutmeg and allspice to a small bowl and mix together.
Wait for the cookies to fully cool before using a pastry brush to brush melted butter on the top of the cookies. Then sprinkle on the spiced sugar. Your apple cider cheesecake cookies are ready to serve!
Next, check out 12 fall cookies that’ll make your home smell amazing.


