The Potential Health Benefits of Pumpernickel Bread
1. Pumpernickel bread has a low glycemic load (GL)
Traditional pumpernickel bread is made with coarsely ground rye flour (and perhaps some wheat flour) and is fermented with sourdough starter. The acetic acid from the starter and the soluble fibre in rye keep the glycemic load (GL) of the bread low—much lower than that of white or even whole wheat bread. (Glycemic load is the measurement of how much carbohydrate you are consuming.)
2. Pumpernickel bread aids digestion
One Canadian study found that pumpernickel bread had four to eight times as much resistant starch as breads made with wheat or barley. Resistant starch benefits blood sugar because it doesn’t digest easily. Like dietary fibre, it travels right past the stomach and small intestine and settles in the colon, where it’s broken down by bacteria and eventually expelled. (Try these delicious slow-cooker bread recipes.)
3. Pumpernickel bread contains healthy plant compounds
As with rye bread, pumpernickel loads you up with lignans, the naturally occurring plant compounds that may help reduce the risk of prostate and breast cancers.
Tips for Eating Pumpernickel Bread
Not all store-bought pumpernickel bread has the same benefits as traditional German pumpernickel, though. Many get their dark colour from molasses, not from whole rye kernels, and a special baking process that takes many hours. These types usually contain more wheat flour than rye, and some are made using yeast instead of sourdough starter. (Here are 35 easy bread recipes anyone can bake.)
Buy authentic
Your best bet is to shop at a bakery that sells artisan breads. Such bakeries tend to use more traditional pumpernickel recipes. If the bread feels heavy for its size, it’s probably the real thing. Commercial brands, if you can find them, include Mestemacher (imported from Germany) and Rubschlager, which makes cocktail rye breads.
Cook’s tips
If you buy traditional pumpernickel bread from the bakery or make it yourself, it’s preservative free, so you’ll need to store it in a plastic bag and eat it within a few days.(Check out how to tie a bread bag to keep your loaf fresh longer.)
Serving suggestions:
- For appetizers, top small squares of pumpernickel bread with cream cheese, sliced onion, and tomato.
- Serve strong-flavoured sandwich fillings, such as aged cheese, on pumpernickel.
- Mustard goes well with pumpernickel, so spread this condiment on your next ham and Swiss sandwich on pumpernickel.
- Serve a slice of pumpernickel as a hearty, satisfying accompaniment to soup or chili instead of crackers.
Next, learn the difference between whole grain bread vs. whole wheat.
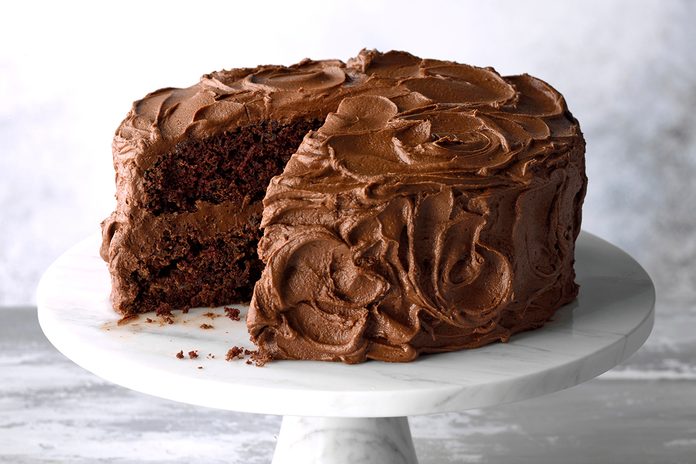
For special occasions, there’s no better dessert than a delicious and perfectly decorated cake. While many of us enjoy visiting our favourite bakery for an elegant treat, it is absolutely possible to get stunning results right at home. All you need to learn how to decorate a cake are a few basic tools (we bet you already have most of them in your kitchen) and a bit of patience.
Now, bake up your go-to layer cake, and let’s get frosting.
Cake Decorating Ideas
Easy Swirls
Think you need to break out your piping bag for an impressive cake? Think again! With just the back of a spoon, you can give your cake a gorgeous swirl texture.
To do this, just layer on your frosting on the outsides and top of your cake. Then, with the back of a spoon, make small swirl shapes until the whole cake is covered with a fun texture.
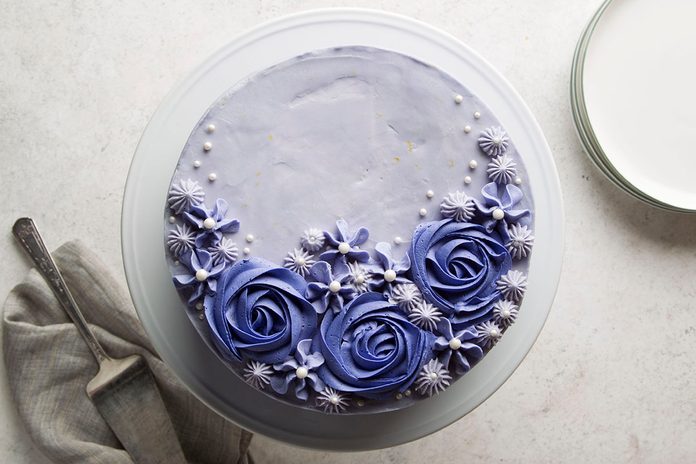
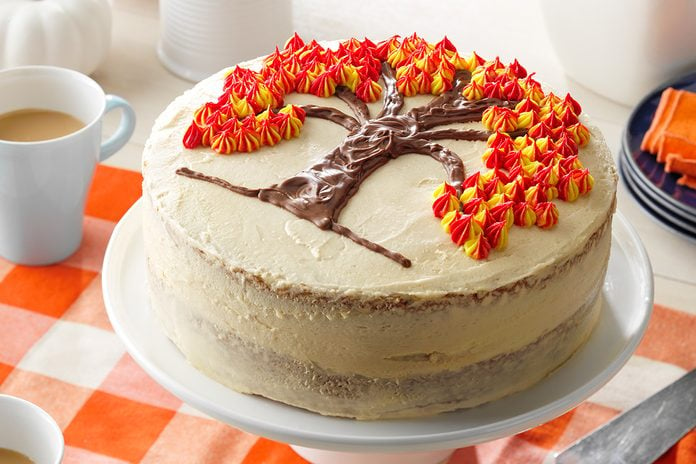
Piping
Want to get really creative? Grab a piping bag and some frosting tips. Each piping tip gives you a different effect so you can create all sorts of decorative techniques.
Use different tips to create flowers, leaves, stars, basketweave patterns and other designs. You can decorate an entire cake this way or used piped motifs as an accent. (Read up on the health benefits of stress-baking.)
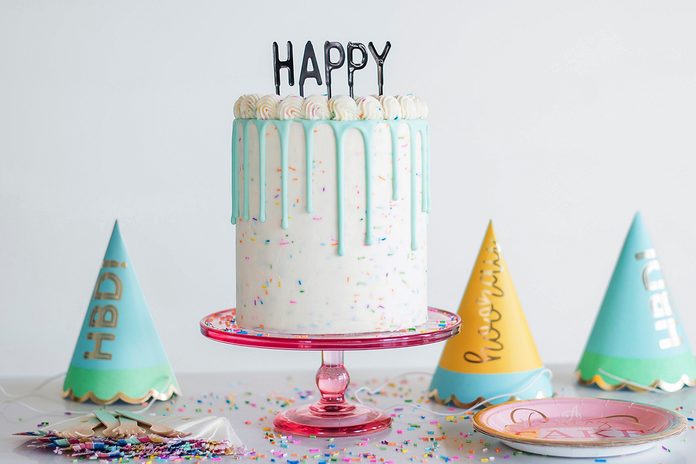
Drip Cakes
There’s something about perfectly imperfect finishes that we just crave. Maybe that’s why we love drip cakes so much! This decorating technique is surprisingly simple.
To start, frost your cake and give it a smooth finish using a bench scraper (it’s a cake decorator’s secret weapon). Then make a ganache with chocolate or baking chips. The confetti cake above uses baking chips, heavy cream and a touch of food colouring.
When the ganache has cooled slightly, spoon it over the top of your cake. Using the back of your spoon, push the ganache to the edges of the cake and watch it slowly drip down the sides to form tempting chocolaty drips.
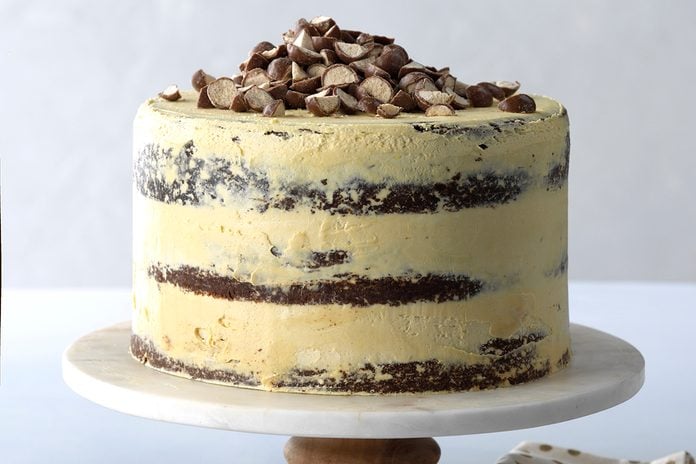
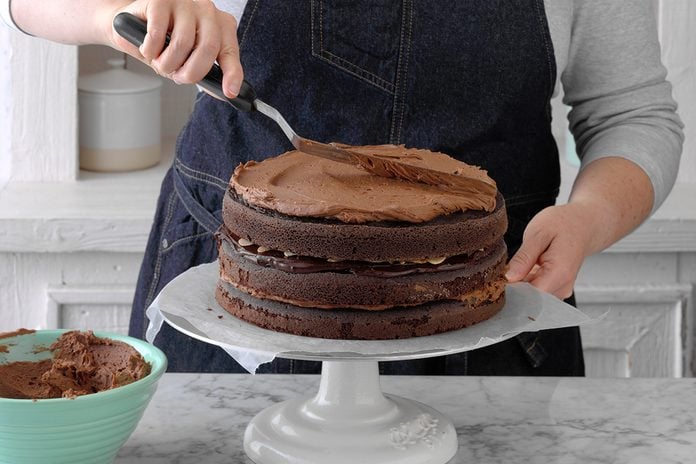
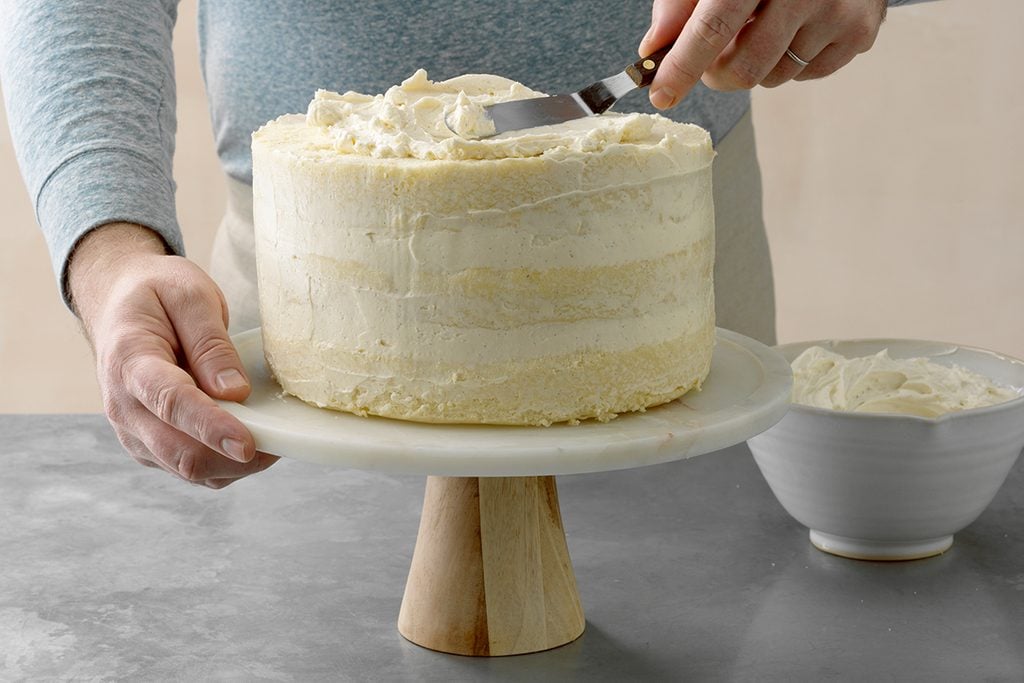
Naked Cakes
If you want to take the trendy route when decorating a cake, try making a naked cake. Naked cakes still use frosting, but it’s applied thinly to let the layers of the cake peek through. These cakes give you a little preview of what’s inside.
To make a naked cake, layer your cake as you normally would with layers of frosting in between. When it comes to the outer coating of frosting, apply thinly and then use a bench scraper to pull away any extra icing. Essentially, you’re just crumb coating the sides of the cake. It’s really that simple!
While this type of cake decorating is pretty minimal, don’t forget to give your cake a little extra finish up top so it looks complete. Fruit, crushed candy or sprinkles can give it the finishing touch. (Don’t miss these 20+ cheesecake recipes perfect for spring!)
Writing and Piped Designs
Part of the appeal of bakery-bought cakes is the perfect penmanship that those cake decorators have. But it’s really not too hard to replicate at home. All you’ll need is a piping bag, a fine piping tip, a toothpick and some patience.
To start, write or print out the message or motif you’d like to be featured on the top of your cake. If you’re very new to piping, do a test run on a sheet of parchment or waxed paper to get used to how the frosting flows out of the piping bag.
After a little practice, trace the design onto a sheet of parchment or waxed paper and lay it on top of your cake. With a toothpick or sharp skewer, prick the design until you have a dot-to-dot of your message. Carefully remove the paper and connect the dots with your piped frosting. That’s all it takes to write on a cake! And once you have a few cakes under your belt, you can do this freehand.
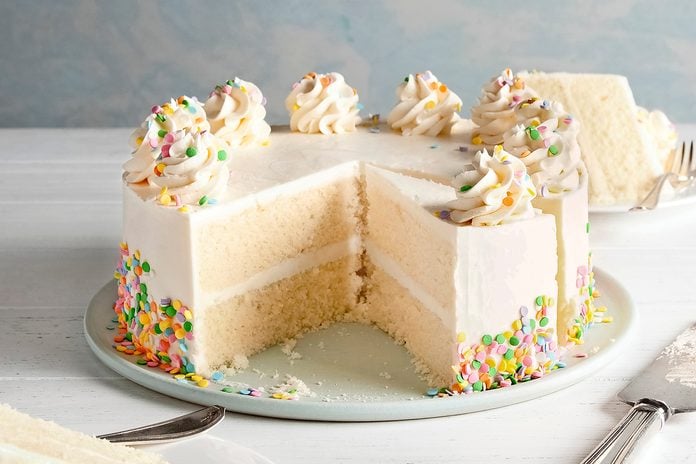
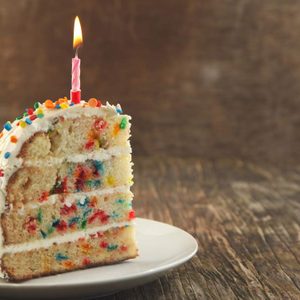
Sprinkles and More
For celebratory cakes, you can’t go wrong with sprinkles and other colourful toppings. You can top your favourite bake with just a dash of sprinkles and edible decorations or combine them with other decorating techniques. Beyond sprinkles, don’t forget about the tempting qualities of toasted nuts, shredded coconut, chopped candy and cookie crumbles. Use any or all of them to add a little extra dazzle to your cakes.
Cake Decorating Tools
To create gorgeous cakes, there are a few decorating tools you’ll want to have in your kitchen. Don’t be daunted by this list—most items cost $15 or less so you can create pretty cakes even on a budget. According to our Test Kitchen, these tools are must-haves:
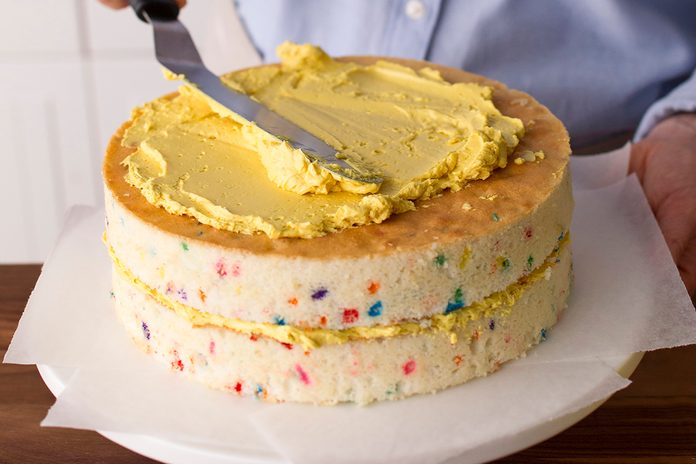
- Offset spatulas: These spatulas are kitchen MVPs, especially when it comes to cake decorating. Large offset spatulas are perfect for adding even amounts of frosting in between each layer of cake. The smaller offset spatulas can help you get smooth finishes and elegant swirls on the exterior of your cake.
- Bench scraper: To give the outside of your cake a smooth finish, you’ll want a bench scraper. This gadget helps smooth away any imperfections. If you prefer a bit of texture, try these cake combs.
- Piping bags and tips: For fancy finishes, you’ll want to invest in piping bags and a few different pastry tips. Use these for writing on cakes, making flowers and other decorative elements.
- Cake turntable: While you can decorate your cake right on a serving plate, the job goes a bit quicker with a turntable. This spinning tray allows you to rotate the cake as you frost so your icing is even and perfectly swirled.
Tips for How to Decorate a Cake
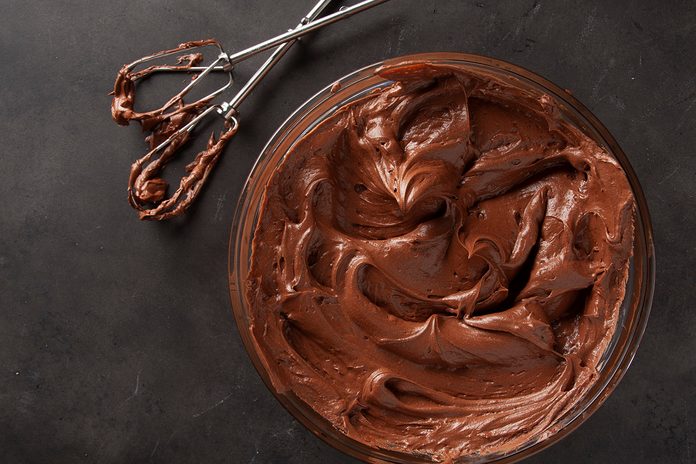
Choose the Right Frosting
Not all frostings are suitable for filling and topping cakes, but the good news is there are still a lot of delicious options. Buttercreams of all kinds work well for decorating. You can also use cream cheese frosting and ermine frosting. Essentially, you want a thicker frosting that can hold up under the weight of the layers of cake and will also stick to the sides. (This genius trick will make store-bought frosting taste homemade.)
In general, when it comes to decorating you want to avoid whipped cream frosting and very thin frostings.
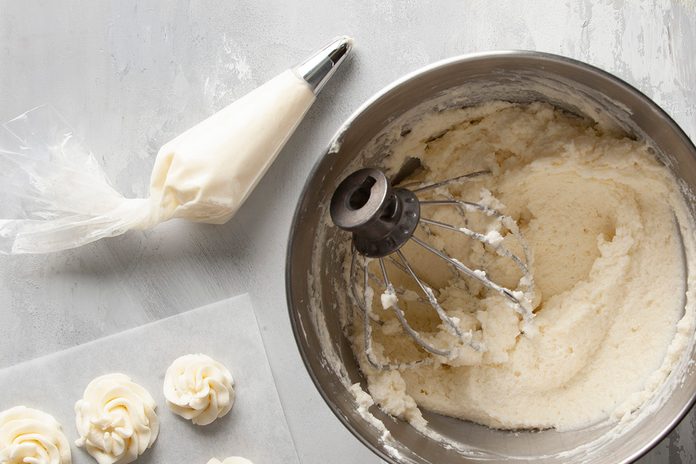
How to Fill a Pastry Bag
Yes, a zip-top bag will do in a pinch, but if you’re serious about decorating cakes, you’ll want real-deal piping bags—either the disposable kind or reusable pastry bags.
To use a pastry bag, start by snipping off the tip. Then insert the tip of your choice inside and make sure it’s pressed snugly in the bottom. Put the bag in a tall glass and fold the end over the lip of the glass. Scoop up your homemade frosting with a spatula and press it into the bottom of the piping bag.
Once filled, squeeze the frosting down into the bag and twist the top (you only want frosting coming out of the tip, not the back end). After your bag is prepped, you can experiment with pressure and piping techniques on a scrap of waxed paper or a plate before moving to your cake.
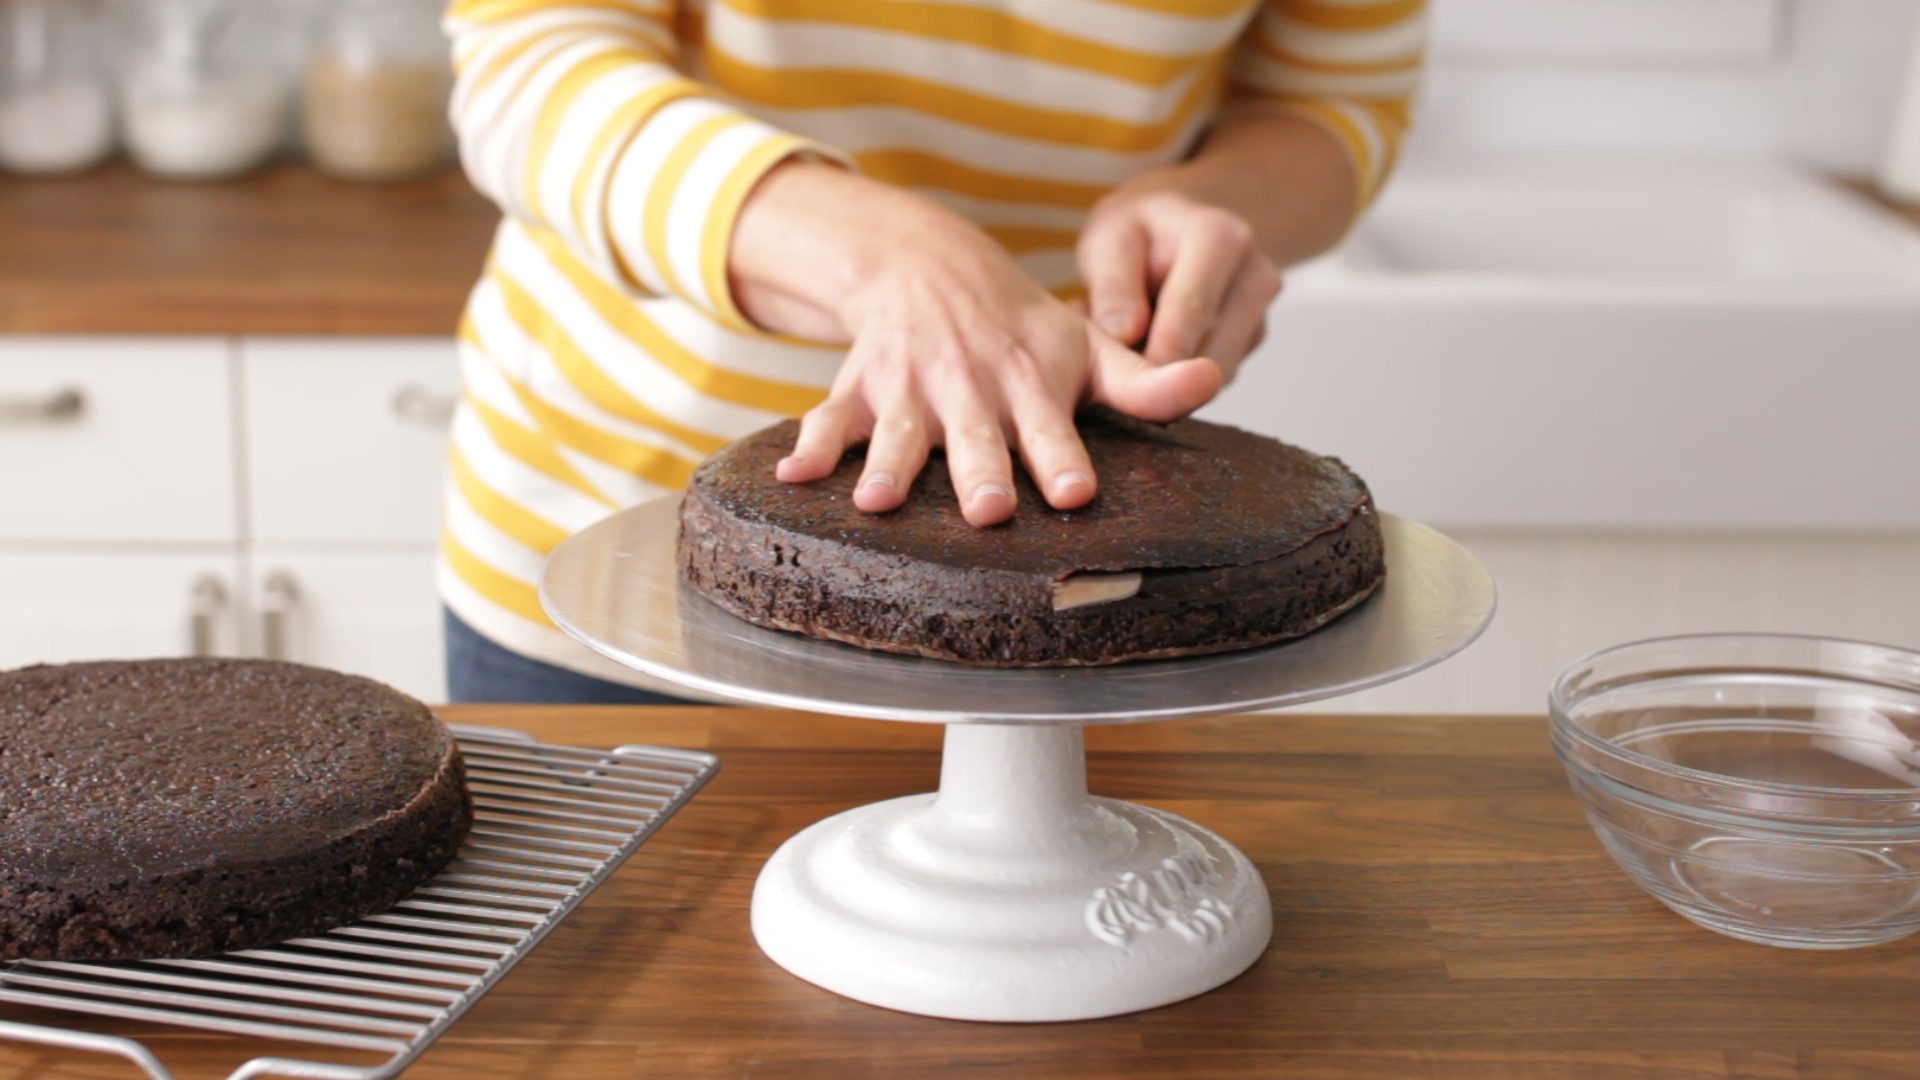
How to Level Cakes
When making layer cakes, it’s important that each layer is level and flat so they are easy to stack. To create even cake layers you can try two different techniques (or a combination of both):
- Cake strips: You can take measurements before your cake goes in the oven for even layers. All you need are cake strips. Soak these strips in water and wrap them around your cake pans before they go in the oven. The damp strips will help the cake bake more evenly, leading to level cakes.
- Serrated knife: After your cake is baked and cooled, use a serrated knife to slice off the domed top of your cake. Work slowly and get down to eye level with the cake. This will help you make an even cut.
Chill the Cake Layers
Cold cakes are easier to frost. If you have the time, pop your cake layers into the freezer to firm up—30 minutes should do the trick. Once chilled, stack and frost as normal. The cake will be sturdier and the chill will help contain some of the crumbs. (Here’s how to get a cake out of a bundt pan.)
And whatever you do, never, ever frost a warm cake—the icing will melt right off.
How to Crumb Coat a Cake
Strange as it sounds, the crumb coat is to prevent a mess, not make one. A crumb coat is a thin layer of frosting applied to the exterior of a cake to help contain crumbs that the cake may shed. This foundational layer means any decoration you apply on top will be neater and cleaner.
To crumb coat a cake, use an offset spatula and apply the icing, and spread it as thinly as possible. Make sure you get the sides and the top. Then pop the coated cake into the freezer for 15 to 30 minutes to firm up before adding more decoration.
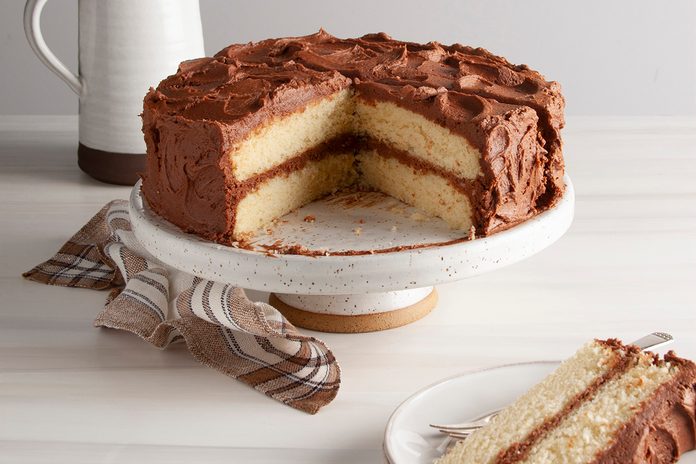
How to Slice a Cake
After all the hard work of baking and frosting, you want every slice of your cake to be picture perfect.
To slice a cake cleanly, grab a sharp knife and dip it into hot water. Then wipe the knife dry and cut into the cake in one fluid motion. The heat from the knife will soften up the frosting and the sharp edge of the knife (nope—no serrated knife or cake cutter needed!) will give you the best looking slice. Wipe the knife clean and repeat for each slice.
Next, put your skills to the test with these 20 easy cake recipes.


What is the Queen without her corgis? The longest-reigning monarch in British history undoubtedly harbours an affinity toward the breed (not to mention neon outfits). In fact, many believe that Queen Elizabeth II has owned more than 30 corgis over the past seven decades.
Although English royals have long been devoted to their dogs, none have been quite so commonly identified with them as Queen Elizabeth. The unbreakable bond between woman and pup began when the Queen’s parents got the royal family’s first corgi, named Dookie, in 1933. She later received her own pooch, Susan, in 1944 for her 18th birthday. Besides tagging along with the Queen and the late Prince Philip on their honeymoon, Susan also gave birth to a pair of puppies in 1949. Thus began the line of royal corgi breeding, which the Queen herself engineered and has lasted for at least 14 generations of dogs.
These pups have since become personal companions to the Queen, and she dotes on them—she even calls them “family.” Her corgis sleep in their own room and eat food prepared by a personal gourmet chef. But besides the endless amounts of love and affection she feels for (and receives from!) them, there’s also a more practical reason to keep her corgis around. They provide a way for the Queen, like any dog owner, to break the ice with strangers with conversation about their pups. Plus, the daily walks and feedings provide a comforting therapy for her, Vanity Fair reports.
Sadly, Buckingham Palace is no longer echoing with the chirps and barks of the Queen’s many corgis. The last surviving member of the royal corgi family, Willow, passed away in 2018.
Next, check out 20+ Queen Elizabeth facts most people don’t know.


Social media is all about connecting with others. But a new study suggests that too much social media leads to disconnection and loneliness—basically the opposite of what we are led to believe.
The study, “Social Media Use and Perceived Social Isolation Among Young Adults in the U.S.,” which was published in the American Journal of Preventive Medicine, found that heavy use of platforms such as Facebook, Snapchat, and Instagram was associated with feelings of social isolation among young adults.
Study co-author Brian Primack and his team from the Center for Research on Media, Technology and Health at the University of Pittsburgh surveyed 1,787 U.S. adults aged 19 to 32 and asked them about their usage of 11 social media platforms (outside of work). They also asked participants questions related to social isolation, such as how often they felt left out. The participants who reported spending the most time on social media—over two hours a day—had twice the odds of perceived social isolation than those who said they spent a half-hour per day or less on the same sites. Additionally, people who visited social media platforms most frequently (58 visits per week or more) had more than three times the odds of perceived social isolation than those who visited them fewer than nine times per week. (Find out more social media mistakes that can damage your relationships.)
According to Tom Kersting, psychotherapist and author of Disconnected, the key to understanding these results lies in our understanding of “connections.” “Humans are social-emotional beings, meaning that it is in our DNA to be connected, face-to-face, with other humans,” he told Reader’s Digest. “Although people think being on social media all the time makes them ‘connected’ to others, they are actually ‘disconnected,’ because the more time one spends behind a screen, the less time one spend face-to-face.”
“Part of the issue of loneliness is that the majority of people who use social media aren’t just posting, they are also viewing,” Kersting continued. “They are spending a lot of time voyeuristically looking at everyone else’s posts, where they are, where they are going and what they are doing. The constant exposure to everyone else’s ‘perfect’ life experiences causes feelings of being left out, of being lonely.”
So what’s the answer? It’s simple, says Kersting—although it does involve a significant amount of will power. “The solution to this is resisting the temptation to look at everyone else’s life. Just focus on your own life, where you’re going, what you are grateful for, and what you want to accomplish in this world. Then go out and do it, and stop wasting so much time comparing.”
Next, check out 10 expert tips for overcoming Facebook addiction.


A mere four days into the RMS Titanic‘s maiden voyage from Southampton, England to New York City in April of 1912, the famed “unsinkable” ship hit an iceberg and proved that description wrong. The luxury cruise liner was the largest of its kind, full of grandeur and technology considered sophisticated for its time. But despite all of its bells and whistles, 1,500 passengers and crew members lost their lives when the Titanic sank off the coast of Newfoundland.
“People are fascinated by the Titanic today for the same reasons they’ve always been,” says Don Lynch, official historian for the Titanic Historical Society. “The largest ocean liner in the world, on its maiden voyage, supposedly unsinkable, loaded with some of the most famous names of the day, hits an iceberg all on its own, and then sinks so slowly there is a lot of time for drama and heroism to be acted out. If it was written as fiction, no one would believe it could have actually happened.”
Among the who’s who of passengers on board were Benjamin Guggenheim, heir to his famous family’s mining fortune; Margaret Tobin Brown (better known as the Unsinkable Molly Brown), who was the wife of another mining magnate; and Colonel John Jacob Astor IV, a real estate tycoon, and his wife Madeleine. Astor went down with the ship but Madeleine survived.
While James Cameron’s blockbuster feature film Titanic enchanted audiences with a fictional love story set aboard the ship, Lynch feels that most people are more interested in why it sank, rather than what life was like on board.
With that being said, we know the Titanic hit an iceberg, but experts continue to debate why it collided with the floating mass. According to Time, one theory is that it made a wrong turn, putting the Titanic in the path of the iceberg. Another is that Jack Phillips, the ship’s senior radio operator, failed to pass along a final clear warning about the impending iceberg. Some also consider the idea that the ship was constructed using some lower-quality materials that were more easily damaged when the collision occurred.
Next, read up on 13 Titanic mysteries that may never be solved.


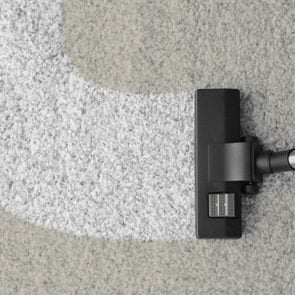
The vacuuming mistake everyone makes
“Bagless vacuums are good for business,” according to one vacuum repairman. The problem isn’t design or manufacturing but user negligence. Vacuum owners empty the dirt canister but often don’t clean the filters. Plugged filters lead to an overworked motor. And sooner or later, the motor burns out. Motor replacement costs at least $100. (You’re also probably making these mistakes with your kitchen appliances.)
People avoid cleaning filters because it’s a messy job. The typical method is to tap the filter against the inside of a trash can until most of the dust falls off. But this raises a thick cloud of dust and doesn’t get the filter completely clean. Here’s a faster, neater, more thorough approach: Take the vacuum out to the garage and clean the pleated filter with a shop vacuum. Some pleated filters have a special coating that you can damage, so be gentle with the shop vacuum nozzle. Clean pre-filter screens and post-filters the same way. (Here are more clever new uses for air compressors you never thought to try.)
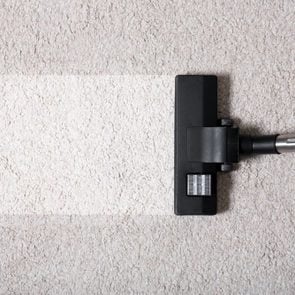
The right vacuuming technique, combined with the right filters, bags and machine, has a significant impact on how much dust remains in your carpeting.
To control dust, keep the following vacuuming tips in mind:
- Vacuum high-traffic areas twice a week and the rest of the carpeting and large area rugs at least weekly.
- Make numerous slow passes over the same area in all directions (fast passes stir up more dust than is being sucked up).
- Use certified True High-Efficiency Particulate Air (HEPA) filters to remove invisible particles and allergens. Look for the word ‘True” on the label.
- If you have allergies, upgrade to a sealed-body bagged vacuum with an airtight “sealed filtration” system that works together with a True HEPA filter. This means all of the exhaust will exit through the HEPA filter instead of leaking dust back into your house through the machine’s housing. Sealed-body vacuums have rubber seals or gaskets around the lid and filter and will last 10 to 20 years. Brands include Riccar, Miele and Sanitaire. (Here’s how often you need to replace everything in your home.)
- Buy high-quality vacuum bags. Inexpensive 2- or 3-ply paper bags leak more dust. Higher-quality cotton-lined paper bags are better, and top-quality synthetic cotton HEPA bags are the best. Bag capacity matters too. Higher-capacity bags capture more, smaller particles that would have otherwise clogged the filter.
- Clean all your bagless vacuum filters regularly and replace them every three months.
- Turn off the agitator brush on hard flooring so you’re not blowing dust into the air.
- Maintain your vacuum: Empty the canister frequently (always outside) and change bags and belts when needed. Keep the agitator brush free of hair and other material, and check the vacuum for cracks and loose hinges and get it serviced every so often to keep it running smoothly.
Next, find out 13 things you should never vacuum.