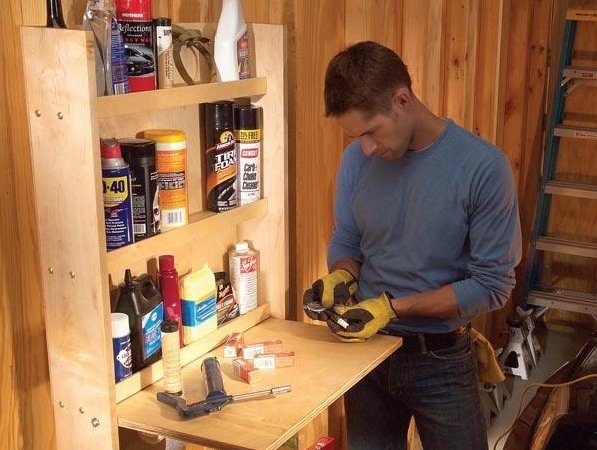
Garage Storage Solution: DIY Project Overview
Is your garage a little chaotic? This garage storage solution – an easy DIY shelf – will help you organize your car care products. It’s a whole lot easier to be a gearhead when all your gear is in one place. This is an easy-to-build garage organizer you can complete in one morning, even if you’re a beginner woodworker. If you build it from construction-grade pine boards and plywood, the materials will cost you about $40. If you use maple boards and birch plywood as we did, it will cost about $70. The only must-have power tools for this project are a drill and a circular saw, though a table saw and a mitre saw would make the job much faster and easier.
DIY Garage Storage Project
Time to build: One day
Complexity: Simple
Cost: $20-$100
Required Tools for This Project
Have the necessary tools for this DIY garage storage project lined up before you start, and you’ll save time and frustration. Find a downloadable shopping list for the materials you’ll need on the next slide.
• Hammer
• Tape measure
• Circular saw
• Drill/driver, cordless
• Drill bit set
• Wood file
• T-square
• One-handed bar clamps
• Wood glue
Materials You’ll Need
1×6 x 6′ (x1)
1×4 x 6′ (x1)
3/4″ plywood, 1/4 sheet (x1)
1/4″ plywood, 1/2 sheet (x1)
1-1/2″ wood screws (x16)
Finish washers (x12)
1/4″ T-nuts (x4)
1/4″ x 1-1/2″ machine screws (x2)
3/4″ brads, wood glue, spray lacquer
120-grit sandpaper
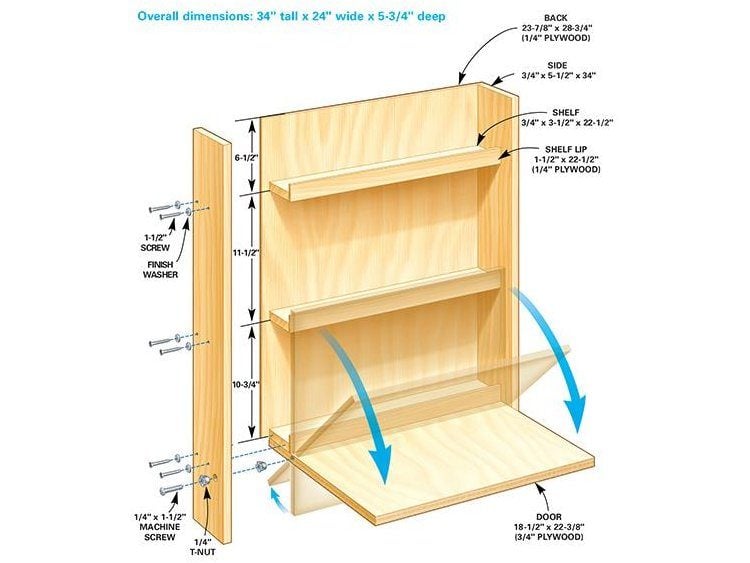
Car Care Storage Unit: Measurements and Overall Dimensions
Download a shopping list of materials to take to the hardware store.
Assemble the Shelves, Part One
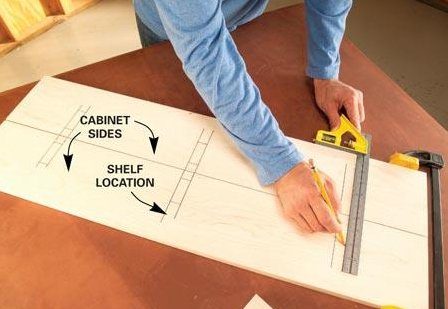
To get started, cut the sides to length, lay them back to back and mark the shelf locations. Then mark and drill 3/16-in. pilot holes for the screws that fasten the shelves. Measure 1 in. and 2-3/4 in. from the back edges of the sides when you locate these holes.
Prevent mistakes by marking shelf locations on both cabinet sides at once. Then mark the screw locations and drill pilot holes.
Assemble the Shelves, Part Two
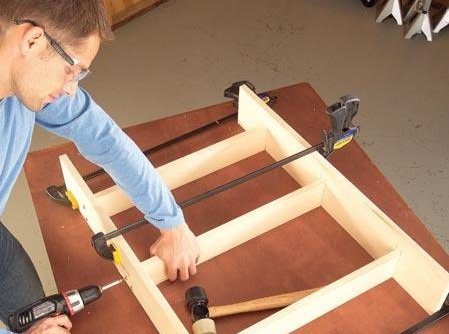
Set the 1×4 shelves between the sides and drill pilot holes into the shelf ends using the holes in the sides as guides. Drilling these pilot holes and screwing the shelves into place is easier if you clamp the whole cabinet together first. But you can hand-hold the shelves against the sides if you don’t have long clamps. After the shelves are screwed into place, rip 1/4-in. plywood into 1-1/2-in.-wide strips for the front lips on the shelves. Glue the lips to the shelves, using 3/4-in. brads or clamps to hold the lips in place while the glue sets.
To complete the cabinet box, lay it face down and make sure it’s square by taking diagonal measurements. Then run light beads of wood glue on the sides and shelves and tack on the plywood back with 3/4-in. brads spaced about 8 in. apart. The back is slightly narrower than the cabinet, so you don’t have to line up the edges perfectly.
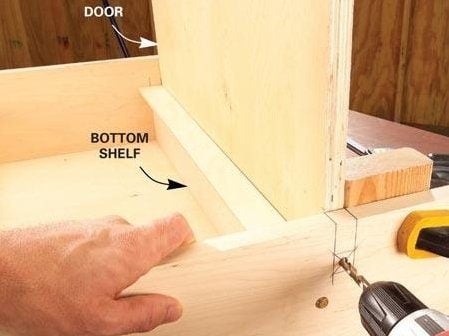
Drill Pivot Holes
Flip the cabinet onto its back and clamp the door into place with the back edge of the door resting flat on your workbench. Using a square, mark the location of the door on the outer sides of the cabinet. Then drill 5/16-in. holes 1-3/8 in. from the front edges of the cabinet sides. Drill through the sides and into the door, stopping at a depth of about 1-1/2 in.
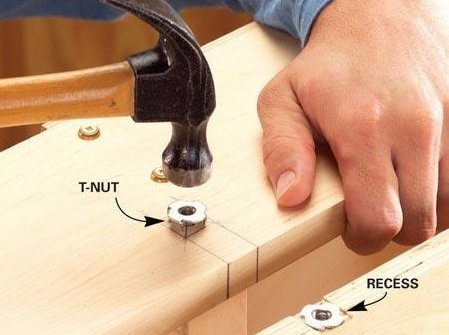
Attach the Hardware
Cut shallow recesses in the door for the T-nuts using a coarse file or wood rasp. Position the door and drive in the machine screws that act as pivot points for the door. Make sure the door opens and closes freely. If not, sand down the edges that bind with a belt sander or an orbital sander. If the fit is a bit sloppy, remove one of the screws and place a washer over the T-nut.
To put a quick finish on the cabinet, remove the door. Sand away any pencil marks and smooth sharp edges. Take the cabinet to a well-ventilated area and apply a couple of light coats of aerosol spray lacquer. The lacquer will harden in just a few minutes. Then lightly sand with a fine sanding sponge and spray on a final coat. Wait about an hour to reattach the door. To mount the cabinet, drive four 1-1/2-in. screws through the back and into studs. Add a dry-erase board and paper towel holder if you like and load those shelves!