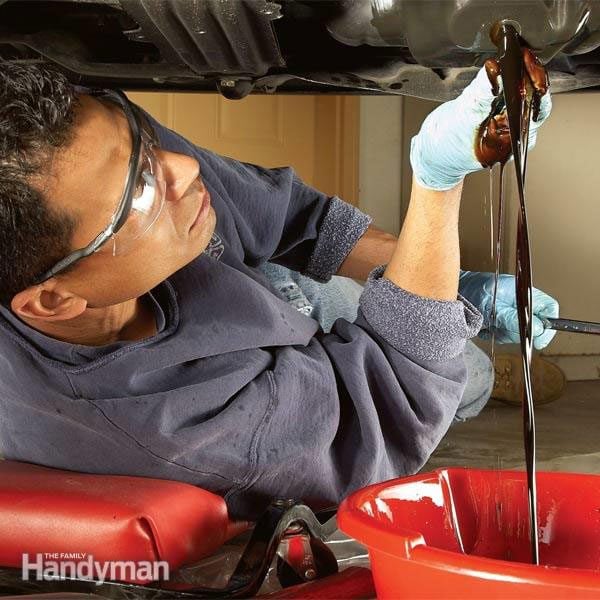
How to Do an Oil Change Yourself, Step by Step
Changing the oil in your car is something that any do-it-yourselfer can do. Although changing the oil might appear rather “duh,” there are still a lot of folks doing it wrong, making it an ugly chore or overpaying for oil changes they could do themselves. Plus, it’s the single most important task you can do to make your engine last. (Here are 13 surprising ways you’re shortening the life of your car.)
Changing your own car oil isn’t brain surgery—you probably did it yourself years ago. But with oil change shops charging more and more, it’s time to get back under the car and start saving big bucks. Plus, you won’t be pressured into buying overpriced add-ons (like new wiper blades and PCV valves) every time you go in for a change. We’ll show you how to change your oil fast and painlessly. And we’ll show you some DIY oil change tips you may not know about.
What you’ll need to do an oil change yourself:
- Rags
- Rubber mallet
- Safety glasses
- Wrench set
- Engine oil
- Oil filter
- Oil filter gasket
- Container for used oil
- Oil filter wrench
- Funnel
- Oil pan
Here are the 20 auto tools no home mechanic should be without.
Buying the Right Oil Filter and Oil for Your Oil Change
Before you head off to the auto parts store, consult your owner’s manual for the type and weight of oil specific to your vehicle. It’s especially important to follow the car maker’s recommendations for oil viscosity. That’s a big change from the old DIY days. Late-model engines rely on oil pressure to regulate valve timing and apply the proper tension to the timing belt or chain. Substituting your personal preference for the manufacturer’s recommendations can result in engine damage, poor performance and even a “Check Engine” warning. (Here’s what each of those dashboard warning lights really mean.)
Don’t Skimp on an Oil Filter
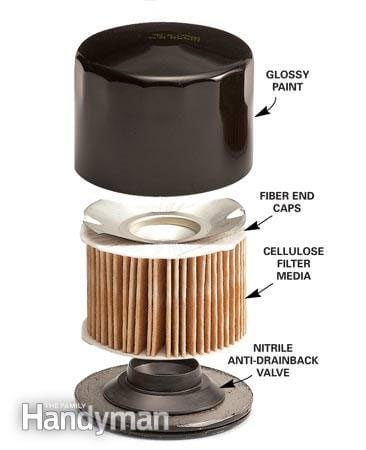
In the old days, oil filters were all pretty much the same inside. But not anymore. If your owner’s manual recommends extended oil change intervals (every 10,000 kilometres instead of 5,000 kilometres), you must buy a filter that’s rated to go the distance. In other words, don’t fill your engine with expensive synthetic oil and then spin on an economy filter—it won’t last. Check the filter box, ask the store clerk, or check the filter manufacturer’s website to make sure the filter you buy is rated for extended oil change intervals.
Try this simple hack and you’ll never miss another oil change!
High Quality Oil Filters
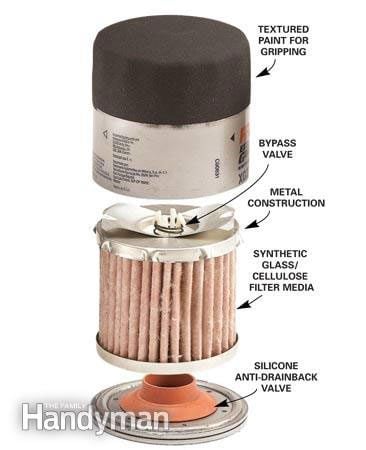
There’s a huge difference between an economy oil filter and a top-of-the-line version (above). But there’s only a small difference in price. If you use conventional oil and diligently change it every 5,000 kilometres, you can get by with the economy filter. But if you regularly “forget” and go beyond that mileage or use long-mileage synthetic blends or full synthetic, spend the extra bucks on a better filter. Look at these cutaway filters and you can see why the premium filter is a better choice. Check out more expert advice on how to buy the right engine oil and oil filter.
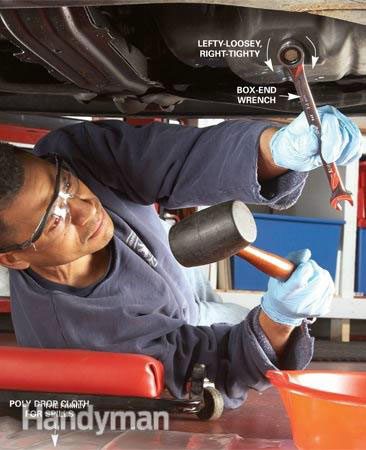
Step 1: Pull the Plug
If you get all your ducks in a row, you can do an oil change yourself in about 20 minutes. Start by spreading plastic sheeting on the ground. Then drive your car on top of it. That will eliminate all oil spill cleanup work since you can just toss the entire sheet when you’re done, or keep it for the next change if you’re lucky enough to go spill-free. Jack up the car, set the jack stands in place, and lower the car. If you’re on asphalt, place squares of plywood under the jack stands for support.
Place all your tools on a tray or in a box so everything you need is in one place. That means a box-end wrench for the drain plug, a rubber mallet, a filter wrench, a drain pan and the new filter. Before you slide it all under the car, open a new oil bottle and smear clean oil on the new filter’s gasket. Then you’re ready to start the job.
Unscrew the plug and quickly pull it out and away from the oil stream. Clean the drain plug and install a new gasket (if required).
Check out more oil change secrets from the pros.
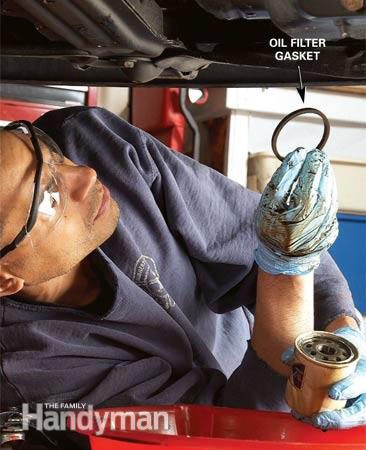
Step 2: Remove the Oil Filter
Crank off the old oil filter and make sure the rubber gasket comes with it. If not, peel it from the engine.
Here are 15 car problems you can diagnose—and fix—yourself.
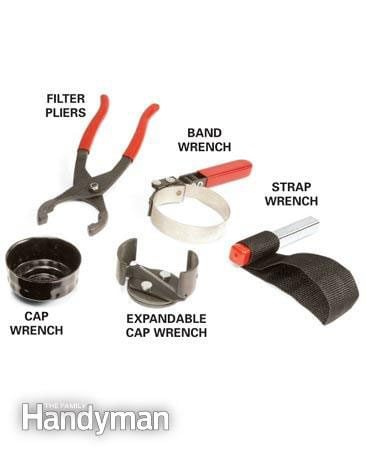
A Note on Oil Filter Wrenches
Different oil filter wrenches work best for different cars. Select the one that gives you the most room to manoeuvre.
You asked, we answered: “What oil should you use for your classic car?”
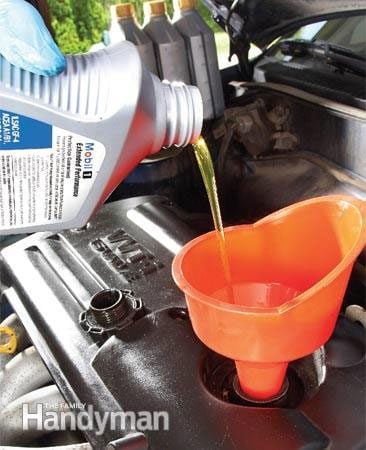
Step 3: Add Fresh Oil
Refill the engine using a funnel and recap the bottle (to prevent spills) before you toss it into the recycling bin.
Psst—here’s the right way to add oil.
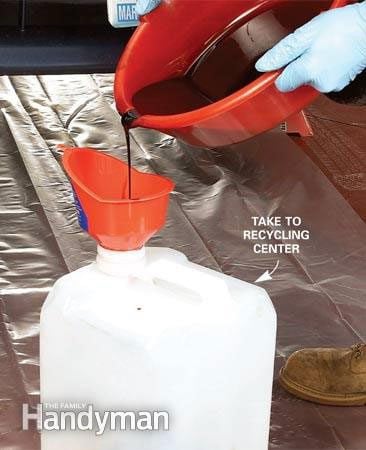
Step 4: Recycle the Old Oil
Pour the used oil into a large jug. Fill the engine and run it until the dashboard oil light goes out. Wait a few minutes. Then check the dipstick and add oil if needed. Find out how to check oil like the pros.

Some Last DIY Oil Change Tips from the Experts
- If the engine is cold, start it and let it run for five minutes to warm the oil. If it’s hot, wait at least 30 minutes to avoid getting burned.
- Never use an adjustable wrench or socket on the drain plug. Use the properly sized box-end wrench, usually metric, for the plug.
- Always use jack stands. Never work under a car that’s supported by a jack only. (Here are more tips on how to use a car jack safely.)
- Use new oil to coat the oil filter gasket before spinning it on.
- Always hand-tighten the filter. Never use a filter wrench.
- Find an oil/oil filter recycling center near you by visiting earth911.com or doing an internet search.
- Line up all the oil bottles you’ll need for the fill so you don’t lose count along the way.
Here are 100 more car maintenance tasks you can do on your own.