How to Fix a Short Circuit in Your Car
Finding and repairing a short circuit in your car or truck’s electrical system can cost $200 and up at a shop. But if you spend $15 on a pro-grade shop manual and $40 on specialty tools (below), you can track it down yourself in an afternoon.
Finding the exact spot where electrical current stops flowing used to involve at least a little guesswork, but modern automotive electrical tools make pinpoint identification possible.
Tools and materials you’ll need for car short circuit repair:
- Short circuit detector
- Fuse socket connector kit
- Shop manual for the year, make and model of your car or truck
- Lineman’s pliers
- Soldering iron
- Utility knife
- Wire crimper
- Butt connectors
- Electrical moisture sealant
- Electrical tape
- Flux
- Solder
Check out 20 automotive tools no home mechanic should be without.

Step 1: Connect the Tester
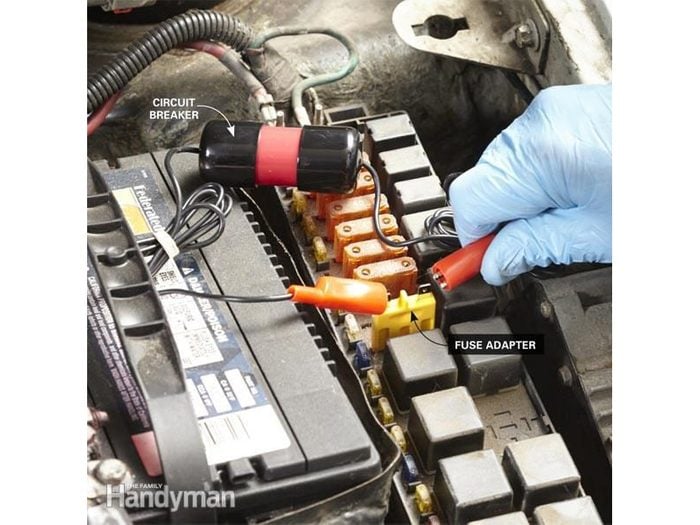
Yank the fuse for the shorted circuit and install a fuse adapter. Then connect the circuit breaker leads to the adapter.

Step 2: Trace the Circuit
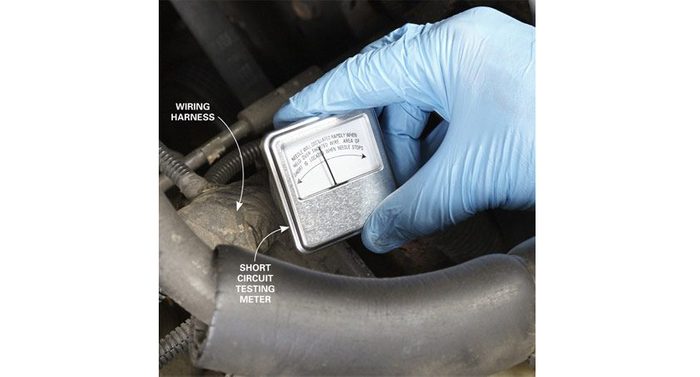
Find the short with the meter by sliding the meter along the wiring harness. Watch the needle swing back and forth. When it stops swinging, you’re at the short. Open the wiring harness and locate the chafed or shorted wires and repair them with electrical tape. Reinstall the fuse and test the circuit.
Now that you know how to fix a short circuit, find out what these strange car noises are trying to tell you.