Replacing Gas Lifts: A Step-By-Step Guide
Worn gas lifts really lose their “oomph” in cold weather. Why risk injury from a falling hatch? You can fix the problem yourself in 20 minutes.
Tools required:
Socket/ratchet set
Small flat-blade screwdriver
Materials required:
Gas lifts
While you’ve got the hood up, why not lubricate the latch and hinges?

Step 1: Support the hatch
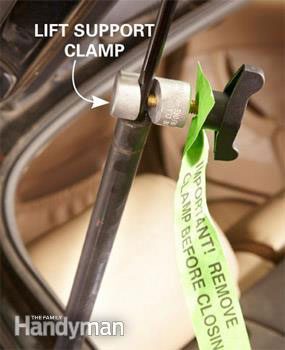
Buy a pair of gas lifts (always replace them as a pair) at an auto parts store. Lift the hatch, hood or trunk lid slightly higher than its normal open position, and have a friend hold it up while you remove the gas lift. Alternatively, you can lock it in place with a lift support clamp (shown is the Lisle 44870). Don’t rely on a 2×4 to hold the hatch open—it’s not a safe alternative.
Try this simple hack and you’ll never miss another oil change!

Step 2: Disengage the lift
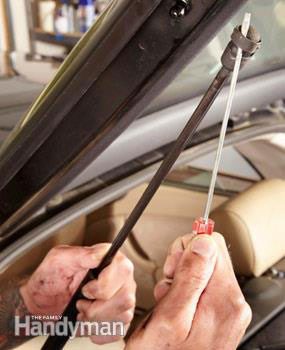
Remove the top portion of the gas lift first. Use a socket and a ratchet to remove the bolted-in-place variety; a flat-blade screwdriver for the more common C-clamp style (shown). Jam the flat-blade screwdriver into the depression in the center of the C-clamp. Then pull the gas lift off the ball stud. Then perform the same procedure on the bottom connection. Reverse the procedure to connect the new lift.
Want to save more money? Here are seven car maintenance jobs you can do yourself.