Covered Clay Pots
These charming pots are so pretty, you’d expect to see them at a fancy gardening store!

You can use either paper napkins or tissue paper for this project, patterned or plain. Napkins are easier to work with, while tissue paper will give the pot a sculpted look.
What you will need:
Newspapers
Colored paper napkins or tissue paper
Clay pot with a bottom hole for drainage
Small sponge-tipped paintbrush
1/4 cup white glue diluted with 1/4 cup water
Pencil
How to do it:
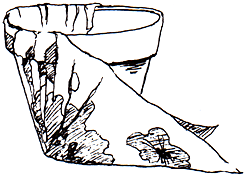
Spread newspapers over your work surface. Open up a napkin or piece of tissue paper and place the clay pot in the center. With the sponge-tipped brush, heavily paint the glue-and-water mixture onto the pot. Next, lift the napkin or tissue up and around the pot, pressing it against the sides. Fold any extra napkin at the top inside the clay pot. The napkin should be wet with the glue mixture and firmly molded against the pot. Place extra pieces of napkin over any bare spots.
Gently paint an extra coat of the glue mixture over the pot. Finally, use the pencil to poke open the drainage hole at the bottom. Let dry completely.
Reprinted with permission from The Mudpies Book of Boredom Busters © 1999 by Nancy Blakey, Tricycle Press, P.O. Box 7123, Berkeley, Ca 94707.


